Grain-Free Mint Chocolate Brownies

Grain-Free Mint Chocolate Brownies

“These are a treat,” I said to Oliver after taking a bite. Fudgy on the bottom, creamy in the middle, and even more chocolatey on top, these brownies are rich all the way through.

If you like York Patties, or Mint Chocolate Chip Ice Cream, or Andes Mints, these brownies are for you. And before I get to far… they are grain-free, gluten-free, and nut-free. Plus, they’re sweetened with honey!

Mint and chocolate is a favorite combo of mine, and when I was day dreaming of holiday baking these stayed in the forefront of my mind. They feel super festive! It wasn’t until after I had made them that I was swiping through images of a cookbook my mom made of her favorite recipes and I found mint brownies nestled in there. Somewhere in the back of my mind I suppose I remembered her brownies…

Grain-Free Mint Chocolate Brownies

Let’s start at the bottom: the brownie base is made of the same batter used in these strawberry cheesecake swirled brownies. It is a very chocolatey, batter that calls for coconut flour and a LOT of cocoa. The result is one fudgy brownie!

The next layer is a sweet mint cream cheese frosting. Most mint brownies call for buttercream here, but I’ve never been a fan of buttercream, and even as a kid I preferred cream cheese frosting. Nothing’s changed on that front! (For extra festive-ness, you can stir in a drop or two of green food coloring if you like.)

The topping is a simple chocolate ganache, making a chocolate mint sandwich that even looks a bit like an Andes Mint!

When you bite through all three layers it is rich, sweet and melt-in-your-mouth delicious… a total treat! (One night we had these with the Mint Chip Ice Cream from CoolHaus. 😍)

Grain-Free Mint Chocolate Brownies

Grain-Free Mint Chocolate Brownies

Published December 6, 2018 by
   Print This Recipe

Serves: 16   |    Active Time: 1 hour


Ingredients:

Brownie Base:
  • 1/2 cup melted unsalted butter or coconut oil
  • 1/2 cup cocoa powder
  • 1/3 cup semi-sweet chocolate chips
  • 1/4 cup honey
  • 2 eggs, room temperature
  • 1 teaspoon vanilla extract
  • 1/4 cup coconut flour
  • 1/4 teaspoon salt

  • Mint Filling:
  • 8 ounces cream cheese, room temperature
  • 1/4 cup honey
  • 1/4 teaspoon peppermint extract

  • Chocolate Ganache Topping:
  • 2 tablespoons unsalted butter or coconut oil
  • 2 tablespoons half-and-half
  • 1/2 cup semi-sweet chocolate chips

  • Directions:

    1. Preheat oven to 350°F and line a 8x8 baking dish with parchment paper.
    2. In a small sauce pan, combine melted butter or coconut oil, cocoa powder, and chocolate. Heat over low heat, stirring until most of the clumps have melted. Remove from heat and allow to sit until entire mixture is smooth and melted.
    3. Scrape mixture into a mixing bowl. Using electric beaters, stir in honey. Add eggs and vanilla and beat again. Mixture should begin to thicken. Add coconut flour and salt. Beat until smooth and no clumps remain.
    4. Spread batter in even layer in prepared baking dish.
    5. Bake for 20 minutes, until brownies are slightly puffy, and a knife comes out clean when inserted in the middle. Allow to cool for completely before topping with mint filling.
    6. Mint filling: while brownies are cooling, beat together cream cheese, honey, and mint until smooth. When brownies are no longer warm to the touch, spread cream cheese mixture over top in an even layer. Place brownies in fridge, covered, for at least one hour (or overnight! Short cutting this time will make it hard to spread the ganache over top and get clean layers.)
    7. Chocolate ganache topping: Place butter, half-and-half, and chocolate in a small sauce pan and heat over low heat, stirring constantly, until a smooth ganache is formed. Remove from heat. Spread chocolate ganache over cream cheese mixture and allow to set 10 minutes before slicing into 9-16 squares. Tip: for the cleanest cuts, rinse your knife between each slice.

    Comment

    Lower Sugar Sweet Potato Casserole with Oatmeal Pecan Topping

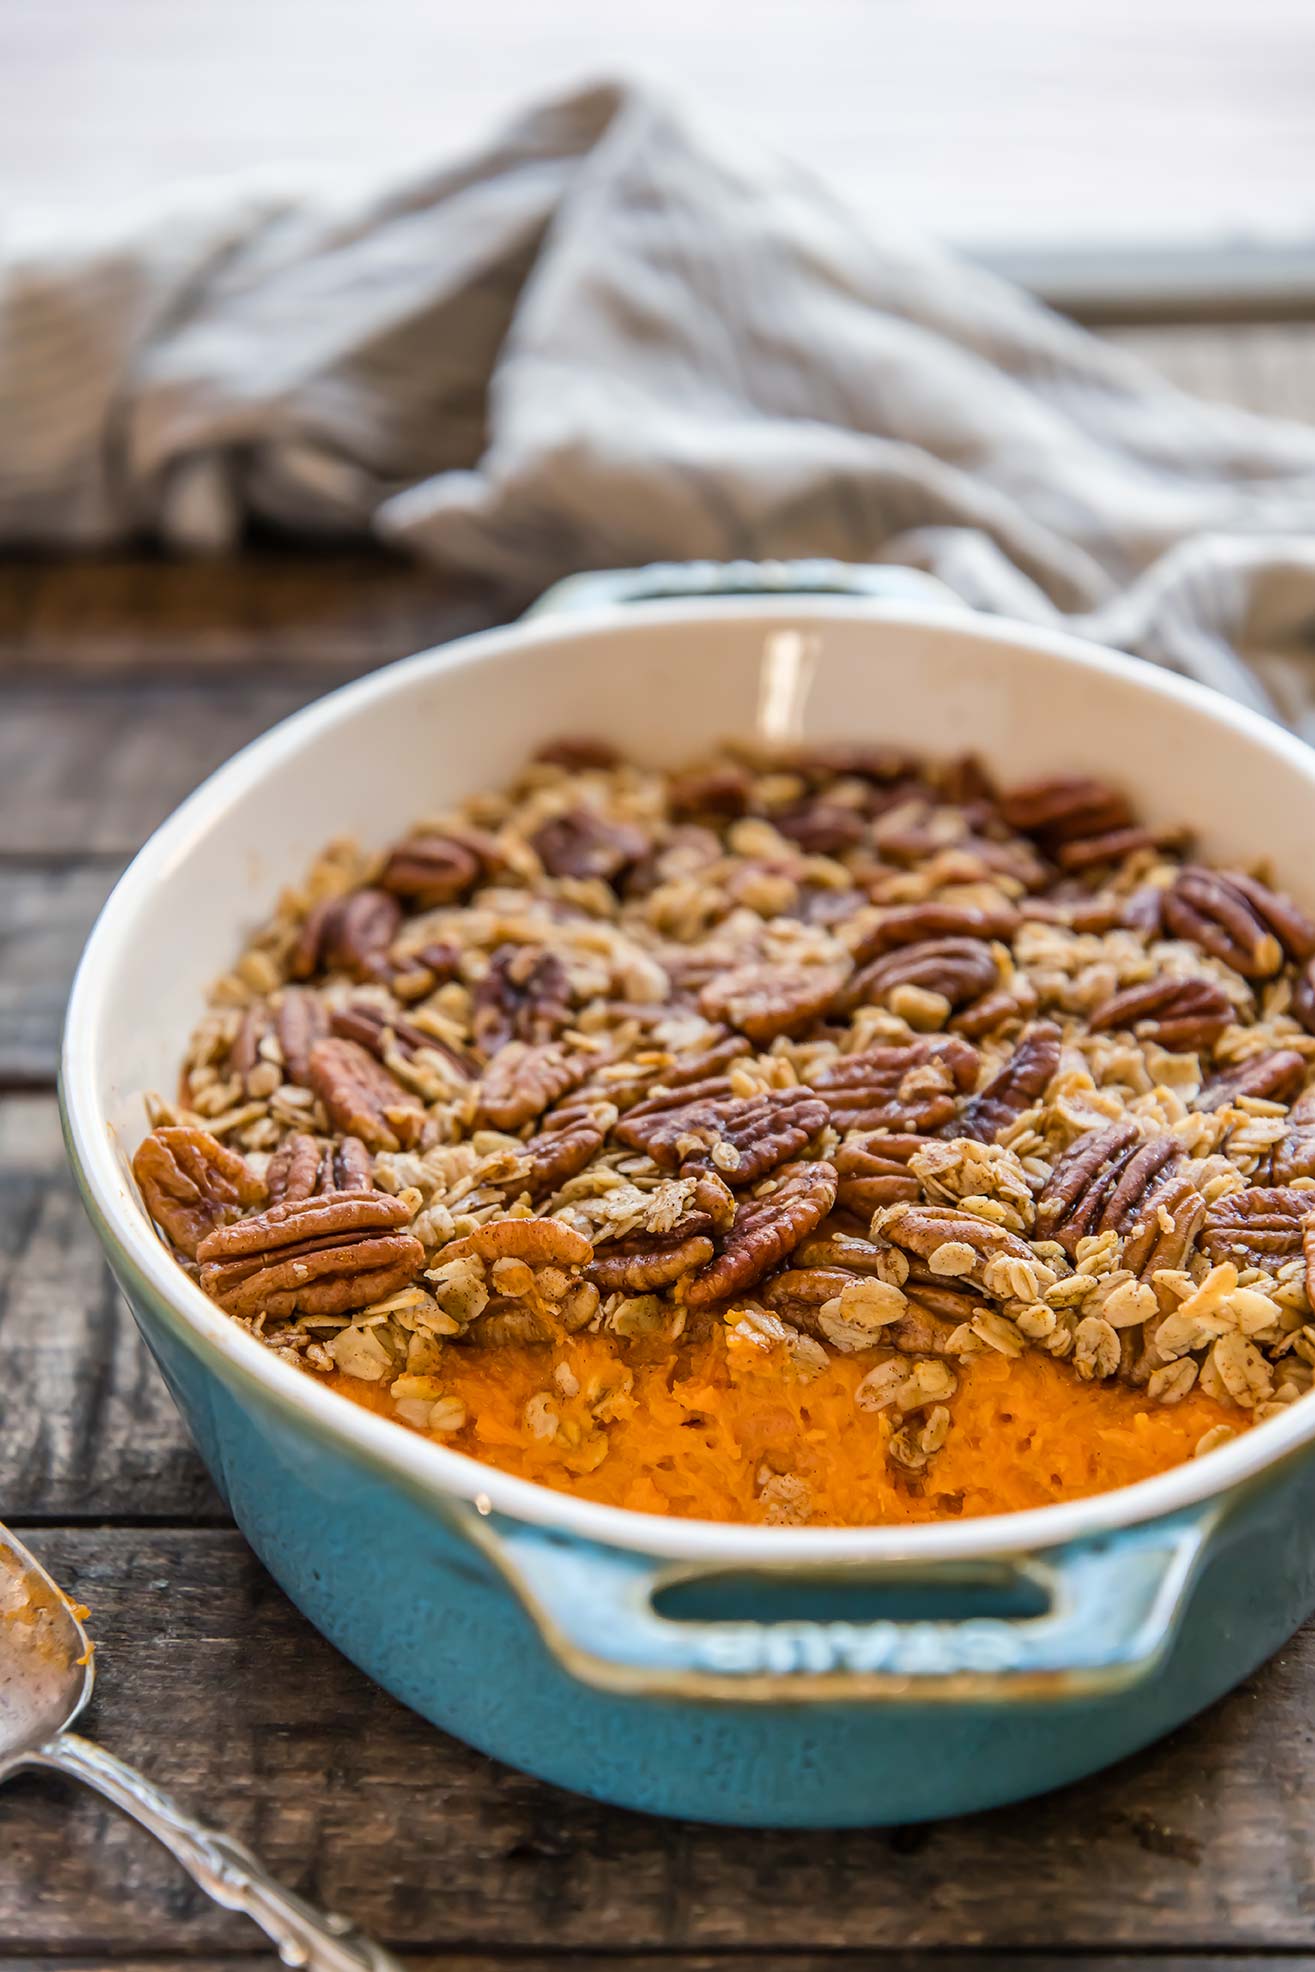
    Lower Sugar Sweet Potato Casserole with Oatmeal Pecan Topping
    Lower Sugar Sweet Potato Casserole with Oatmeal Pecan Topping

    I grew up on the sort of sweet potato casserole that is topped with marshmallows, and I love the stuff.

    One Thanksgiving in California is vividly stamped in my mind — the year we visited my grandparents and I realized for the first time that my grandma cooked almost every dish for Thanksgiving dinner in the microwave. IN THE MICROWAVE! Coming from rather culinary parents, it was a bit of a shock, and I’m not sure why I hadn’t noticed in previous years (I don’t even remember other Thanksgiving dinners at their house; maybe this was a first).

    Anyways… this sweet potato casserole is not made in the microwave (do I even need to say that?) and so it’s off to a far superior start already! But it’s also been revised in other ways, calling for less sugar and being topped with crumbly, crispy pecans and oats instead of marshmallows. Because, sugar and marshmallows just don’t leave me feeling my best.

    Sweet potatoes are quite sweet as they are, so adding sugar to the filling feels unnecessary (most recipes call for 1/4 to 1/2 cup of added sugar). In this version the filling is “natural,” meaning all the sweetness comes from the sweet potatoes, and the topping is made with maple syrup and cinnamon (which has sweet notes of it’s own!).

    As Oliver would say, this dish comes out of the oven “smelling sweeter than a plate of yams with extra syrup.”

    Lower Sugar Sweet Potato Casserole with Oatmeal Pecan Topping
    Lower Sugar Sweet Potato Casserole with Oatmeal Pecan Topping

    Tip: Cook the sweet potatoes ahead of time! You can cook the potatoes up to three days before you’re going to make this casserole. Here are a couple of ways to cook them (affiliate links ahead!):

    • In an Instant Pot: Place whole sweet potatoes in your Instant Pot with 1 cup of water (use a steamer basket if you have one). Use manual mode and set to high for 15 minutes (vent in sealed position). Allow pressure to release naturally, then open pot. Allow potatoes to cool, and then remove skins, which should easily pull off at this point.

    • In an oven: Preheat oven to 425°F. Prick sweet potatoes with a fork and rub with oil (such as coconut oil). Place potatoes on a baking sheet lined with aluminum foil or a sil-pat and bake for 45 minutes.

    In both of these methods, the natural sugars in the sweet potatoes will caramelize so that your sweet potato casserole tastes sweet without the added sugar.

    Thanksgiving is THIS WEEK. What else are you making? What’s your favorite thing once you sit down at the table?

    Lower Sugar Sweet Potato Casserole with Oatmeal Pecan Topping

    Lower Sugar Sweet Potato Casserole with Oatmeal Pecan Topping

    Published November 20, 2018 by
       Print This Recipe

    Serves: 4   |    Active Time: 4 hours


    Ingredients:

  • 3-4 cups mashed sweet potato
  • 1/4 cup half and half or canned coconut milk
  • 3 tablespoons melted butter or coconut oil
  • 1/2 teaspoon salt
  • 1 teaspoon vanilla

  • For Crumble Topping:
  • 1/4 cup melted butter or coconut oil
  • 1/4 cup maple syrup
  • 1/3 heaping cup rolled oats
  • 1 heaping cup pecan halves

  • Directions:

    1. Preheat oven to 350°F.
    2. Combine the first five ingredients in a mixing bowl and stir until well incorporated.
    3. Spread sweet potato mixture in an even layer in a 9x9 baking dish.
    4. In a separate bowl, combine ingredients for crumble topping. Spread crumble topping in an even layer over the sweet potatoes.
    5. Place baking dish in the middle rack of the oven and bake 25-30 minutes. Sweet potatoes should be warmed through and pecans on top should be lightly toasted. Allow to cool 10 minutes before serving.

    1 Comment

    Grain-Free Sandwich Cookies With Pumpkin Butter

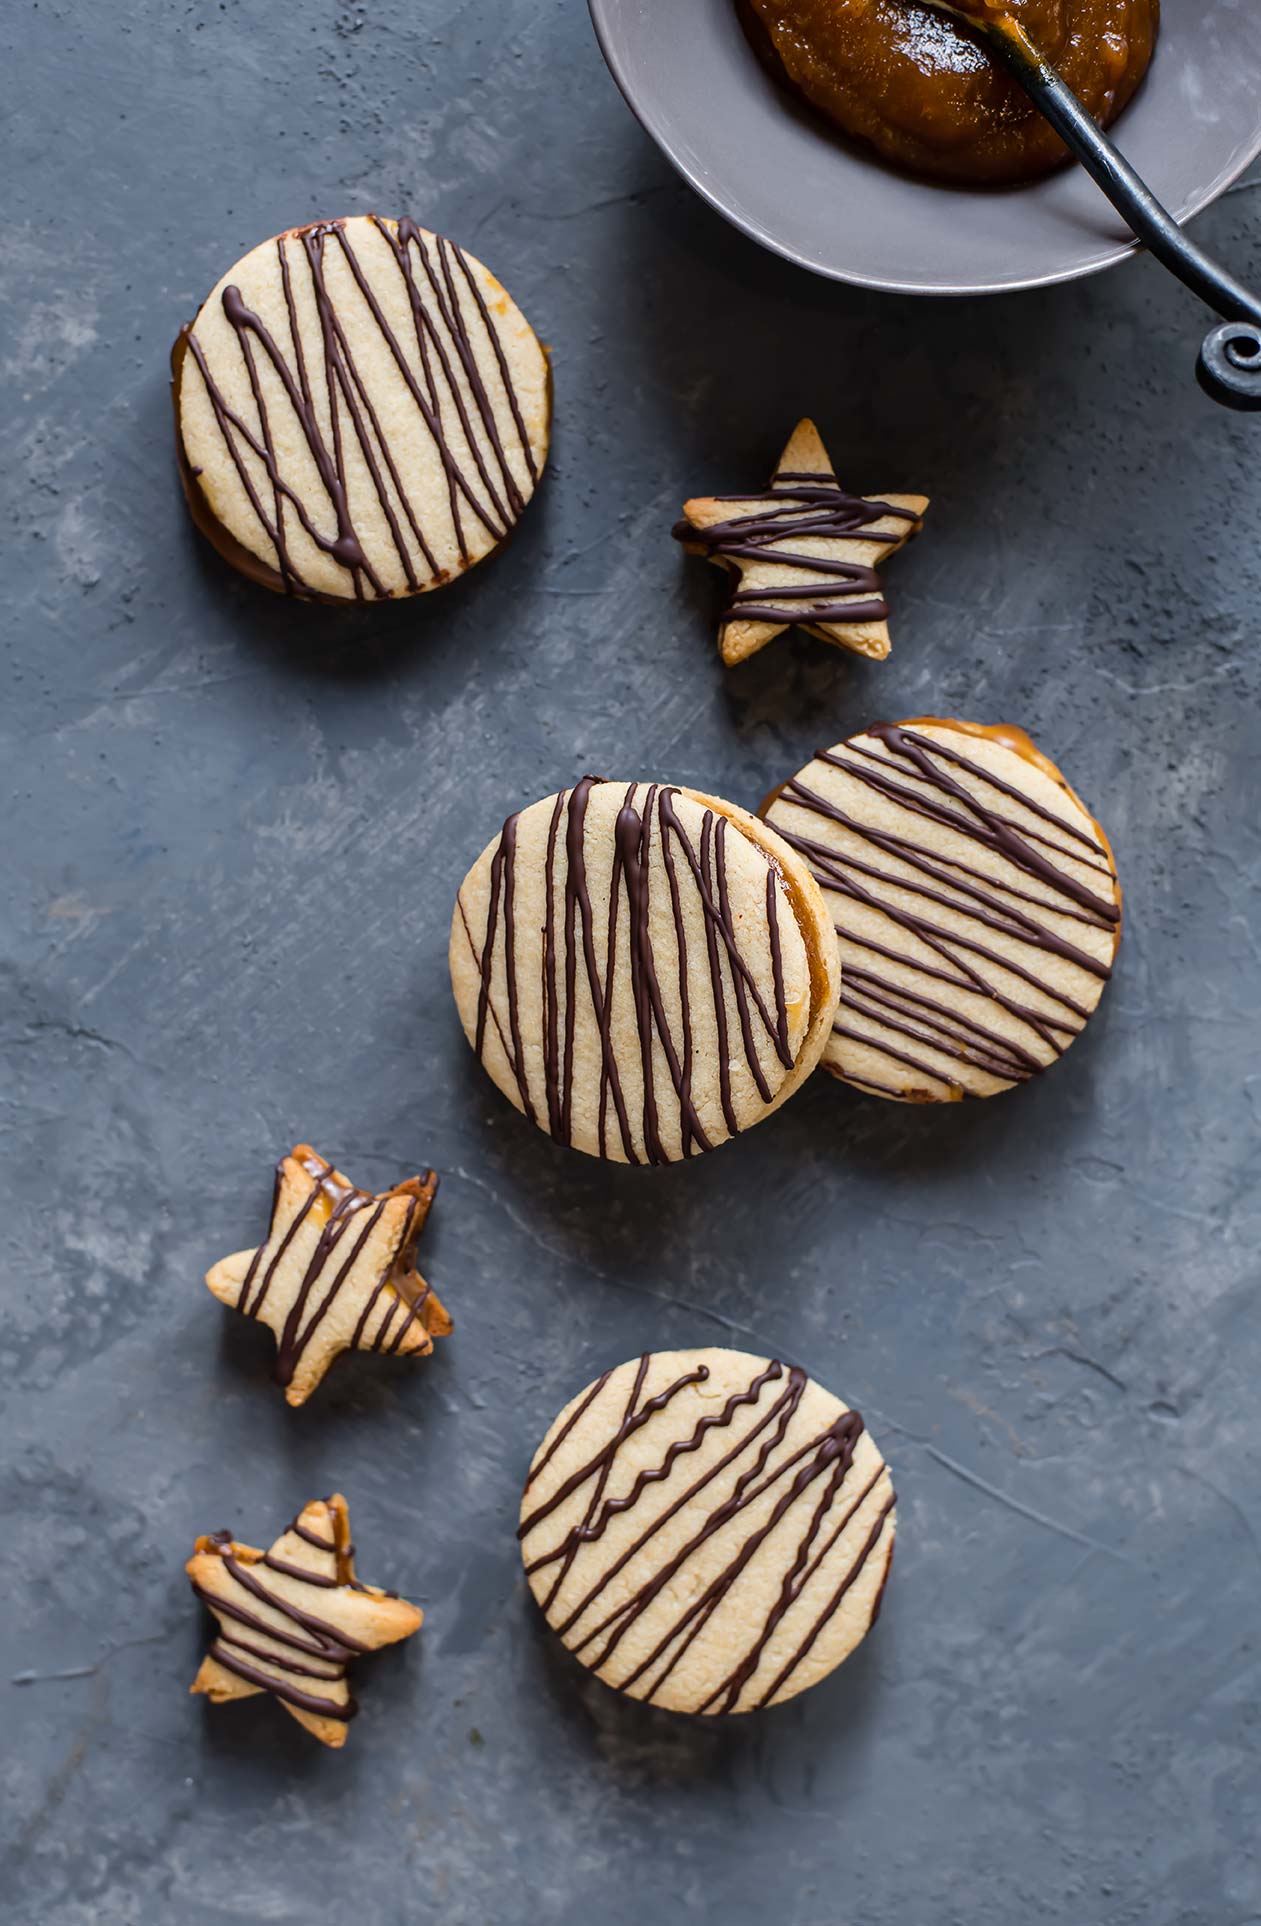
    Grain-free sandwich cookies with pumpkin butter
    Grain-free sandwich cookies with pumpkin butter

    I have been on a kick, going back to old Foraged Dish recipes and taking new photos. It is insanely satisfying to compare the old ones to the new. Progress is difficult to measure day-by-day, but all of those days add up! I’m sure, in three years, I’ll look back at my photos from 2018 and roll my eyes. C'est la vie.

    These sandwich cookies were one of my recent victims, and since it is the season for baking and pumpkin, I thought it would be a good opportunity to update the whole post. That means a few updates to the recipe, too:

    • Simplified. (Can I get a hoorah?) The original asked for both almond flour and coconut flour, but since 2015 I’ve discovered a much simpler grain-free shortbread cookie using just almond flour. I quite like the texture of the cookies, too! They are a bit chewy, stay together well, and have great almond and honey flavor.

    • Drizzled with chocolate. How can you make a boring cookie look a little fancier? Maybe you’re thinking frosting, which is true, but since this cookie is a sandwich I wanted the filling to shine. I drizzled each cookie with chocolate, which was just the right touch!

    • Doubled it. More is better right? In this case, there’s no doubt: the original recipe made about 6 sandwich cookies… what was 2015-me thinking?!?! A dozen is much more reasonable (but you still may want to double that if you’re cooking for a crowd).

    Once baked, these cookies are stuffed with pumpkin butter, so the end result tastes a bit like pumpkin pie. Perfect match with a cappuccino! But I also experimented with filling the cookies with salted caramel. Oh. My. Goodness. Now that’s a treat! A bit like an alfajore, if you are familiar. I am definitely going to need to make an alfajore recipe now (Foraged Dish style, of course!).

    Grain-free sandwich cookies with pumpkin butter
    Grain-free sandwich cookies with pumpkin butter

    Grain-Free Sandwich Cookies with Pumpkin Butter

    Published October 26, 2015 by
       Print This Recipe

    Yield: 12-24, depending on size   |    Active Time: 60 minutes


    Ingredients:

  • 2 cups finely ground almond flour
  • 1/4 teaspoon baking soda
  • 1/4 cup butter or coconut oil, melted
  • 1/4 cup honey
  • 1 teaspoon vanilla extract
  • 1/2 cup pumpkin butter
  • 1/4 cup dark chocolate

  • Directions:

    1. In a medium mixing bowl, combine the almond flour, salt, and baking soda. Whisk until incorporated. Add the melted butter or coconut oil, honey, and vanilla, and stir until a dough forms. Shape dough into a disc (about 1 inch thick), wrap in plastic wrap, and place in fridge for 30 minutes to 1 hour to chill.
    2. Preheat oven to 325°F. After dough has chilled, remove from fridge. Cut a piece of parchment paper to fit your baking pan.
    3. On a separate piece of parchment, use a rolling pin to roll dough out to 1/4-inch thickness. Use cookie cutters to cut circles out of dough and place on baking sheet, with at least 1/2 inch between each cookie. Bake for 9 minutes, until golden. Allow to cool.
    4. Once cookies are fully cooled, spread pumpkin butter on one cookie, and then use another to create a sandwich. Set aside, and then continue until all of the cookies are sandwiched.
    5. Heat the chocolate in a microwave-safe bowl for 30-second intervals (string between each!) until chocolate is glossy and smooth. You can also do this in a double boiler (stir frequently). Drizzle melted chocolate over sandwich cookies. Allow chocolate to set before serving cookies.
    6. Tip: You can use any sort of jam to fill these cookies! I also made a few with salted caramel sauce and they were SO. GOOD.

    4 Comments