Dark Chocolate Sour Cream Cake

Dark Chocolate Sour Cream Cake

It may seem funny to start the new year with a recipe for chocolate cake, but when you wake up thinking about making a chocolate cake — dreaming of a rich, fudge-y crumb — well, it’s a good sign you should get baking. Besides, I’ve never been one for resolutions.

This chocolate cake is rich, with a deep chocolate flavor. As far as cakes go, it’s not too sweet, which is perfect for me (if you prefer a sweeter cake, increase the granulated cane sugar to 1 cup). Good for a celebration or just any old day! Eat plain or with a dollop of whipped cream.

Happy 2021!

Dark Chocolate Sour Cream Cake

Dark Chocolate Sour Cream Cake

Published January 4, 2020 by

Serves: 9   |    Active Time: 1 hour 30 minutes


Ingredients:

  • 1/2 cup unsalted butter, softened
  • 1/2 cup firmly packed light brown sugar
  • 1/2 cup granulated sugar (Option to increase this to 1 cup if you prefer a sweeter cake)
  • 1 large egg
  • 3/4 cup sour cream
  • 1/4 cup strongly brewed coffee
  • 1 teaspoon vanilla extract
  • 1 1/2 cups all-purpose flour
  • 3/4 cup Dutch-processed cocoa powder (Raw cocoa powder is more acidic so will change how this cake bakes. IT will still be delicious, but for the fluffiest cake, I recommend Dutch-processes. Try Droste cocoa powder -- my go-to!)
  • 1/4 teaspoon baking soda
  • 1/4 teaspoon baking powder
  • 1/4 teaspoon Diamond Crystal table salt
  • Optional: Small handful semi-sweet chocolate chips
  • For serving: Whipped cream

  • Directions:

    1. Preheat oven to 325°F. Prepare a 9x4 (standard) loaf pan by greasing with butter and dusting lightly with flour. Tap off any access flour.
    2. In the bowl of a stand mixer (or in a large bowl with an electric hand mixer), cream together the butter and sugars until fluffy. Add the egg, sour cream, coffee, and vanilla and continue to beat for about 3 minutes.
    3. In a separate bowl, combine flour, cocoa, baking soda, baking powder and salt, and sift (or whisk) to incorporate. Add dry ingredients to the butter mixture and mix until just incorporated. Do not over mix -- a few little clumps may remain and that's ok!
    4. Using a spatula, spread the batter into the prepared loaf pan. Optional: Sprinkle a small handful of chocolate chips over top.
    5. Bake for 60 to 70 minutes, or until a toothpick inserted into the center of the loaf comes out clean. Cool on a rack for at least 10 minutes before removing the cake from the pan, then continue to cool for 10-15 more minutes.
    6. Slice and serve with whipped cream.

    1 Comment

    Raspberry Popsicles with Dark Chocolate Drizzle

    Raspberry Popsicles with Dark Chocolate Drizzle

    Poison ivy and raspberry bushes—when I was a kid, these were the two plants my dad always pointed out to me on camping trips. This summer, as we hiked through Big Elk Meadows (which is not a meadow and there were no elk), the wild raspberries were copious. The dry creek was spotted with small bushes, each of them ripe with red gems. Those wild berries were far better than the ones growing in my own backyard, and not just because we were eating them outside. They were juicier and sweeter. We ate the ripest ones and left the others for the birds.

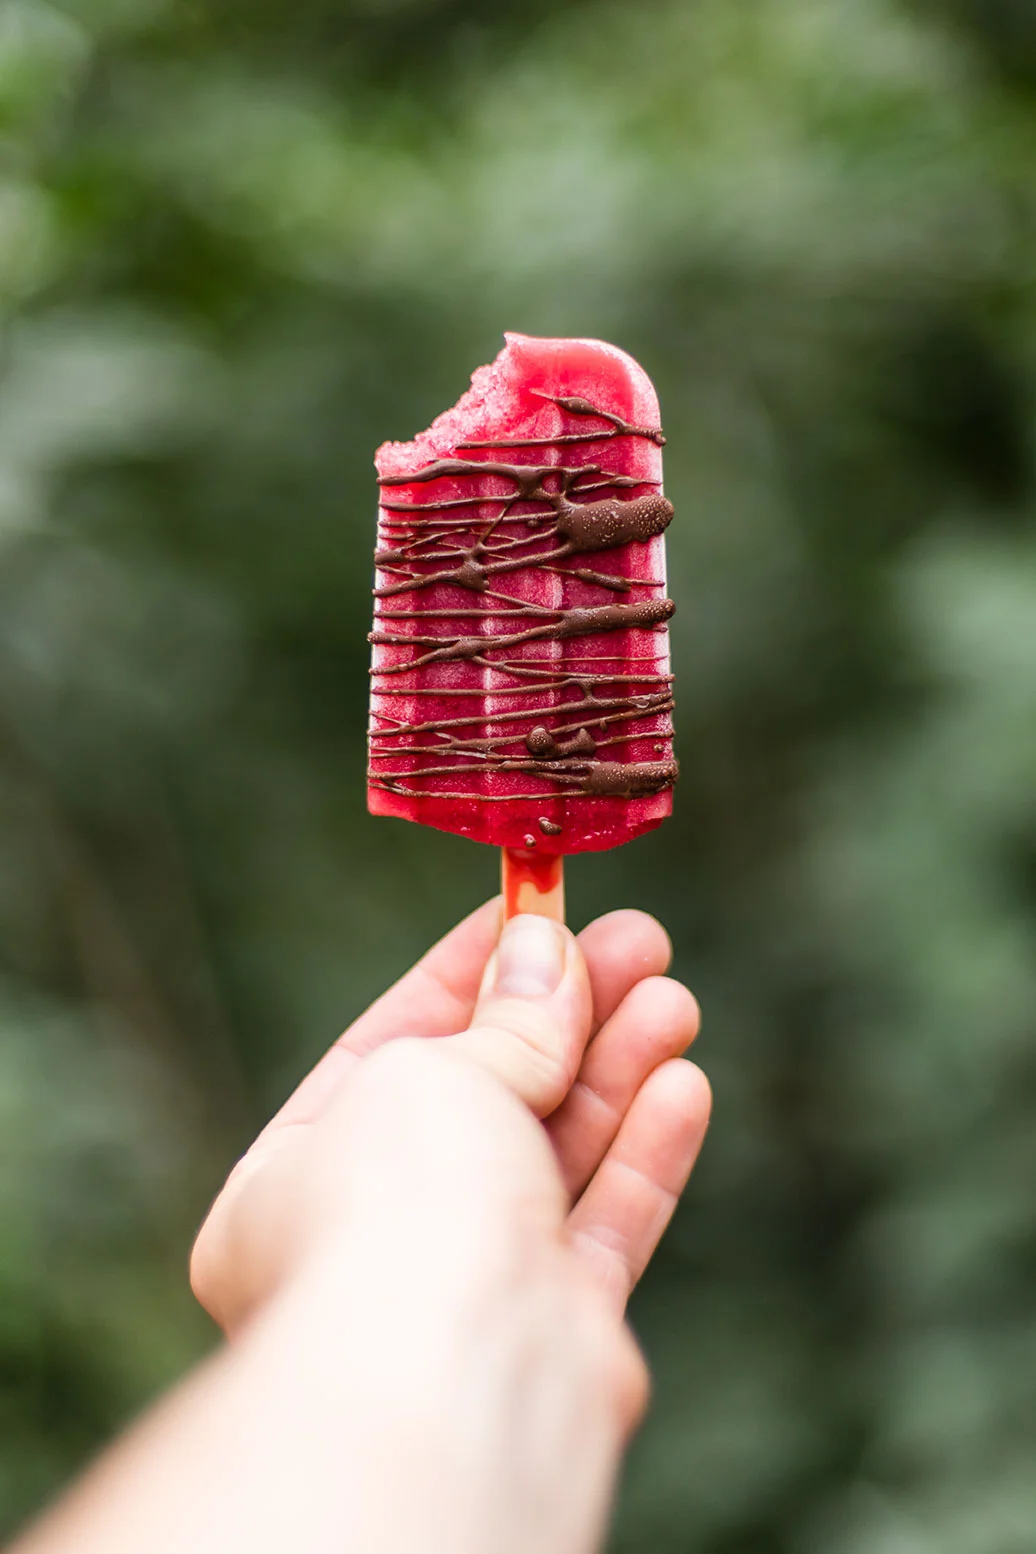
    These popsicles are an end of summer hoorah! A sweet-tart cool down for mid-afternoon.

    Raspberry Popsicles with Dark Chocolate Drizzle
    Raspberry Popsicles with Dark Chocolate Drizzle

    Raspberry Popsicles with Dark Chocolate Drizzle

    Published September 10, 2019 by

    Serves: 6   |    Active Time: 20 active minutes


    Ingredients:

  • 12 ounces fresh raspberries
  • 1/4 teaspoon lemon or lime juice
  • 2 ounces bittersweet chocolate chips
  • Optional: 1-2 tablespoons raw sugar or coconut sugar
  • Equipment: Popsicle molds and popsicle sticks

  • Directions:

    1. Place raspberries in a blender and purée.
    2. Place a fine-mesh sieve over a sauce pan, and pour raspberry puree through sieve in order to remove seeds. All of the juice should go through the sieve (into the pot), and you should be left with just seeds in the sieve. Discard of seeds.
    3. Place raspberry purée on stove over low heat and stir in lemon juice. Bring to a slow simmer, and add sugar to taste. Stir until sugar is completely dissolved. Allow mixture to cool, about 10 minutes.
    4. Pour raspberry mixture into popsicle molds with popsicle sticks and freeze for 8 hours, until frozen solid.
    5. When popsicles are frozen, prep the chocolate: melt chocolate in microwave (at 30 second increments, stirring in between each until smooth), or in a double boiler.
    6. Remove popsicles from molds, and drizzle with chocolate. Allow chocolate to set. Serve immediately, or store in air-tight container until ready to eat.

    Chocolate Chip Energy Bites

    This is an older recipe from Foraged Dish that I wanted to spruce up with new photos and a video. These energy bites are so darn delicious — they’ve been in my snack draw at work and I SO look forward to snack time each day! 

    Chocolate Chip Energy Bites

    Last week I went on a hike in the Front Range with nothing in my bag but my camera, my phone, and a ziplock stocked with these Chocolate Chip Energy Bites. I thought I had my car key too, until 30 minutes in when — oh no! - I noticed the pocket where I keep my key was open. Open and empty. 

    I immediately turned on my heels and spent the whole hike downhill with my head turned down, eyes constantly scanning the trail. I tried to soothe my inner chatter box, which, by the time I made it back down to the trailhead with no sign of my keys in sight, was freaking out.  In the end, I had to call for a ride to go get a spare key (thanks, Dad!). 

    But I digress. Casualties of hiking alone are not what this post is about!

    Chocolate Chip Energy Bites
    Chocolate Chip Energy Bites

    These energy bites call for only six ingredients and they just go into your food processor and you roll them up. That’s it!  Why macadamias and cashews? Macadamia nuts are extra buttery, which lends very well to this recipe, which taste a lot like a healthy version of cookie dough! At the same time, cashews are a bit starchier than most nuts, and their sweet flavor also gives these bites a bit of a “cookie dough” flavor. 

    Mini chocolate chips are best in this recipe because they distribute into each energy bite well. Each bite has a bit of chocolate and a bit of nut mixture, which sticks everything together. 

    Happy hiking! Take these with you — and don’t lose track of those keys!! 

    Chocolate Chip Energy Bites

    Published January 15, 2018 by

    Yield: 12   |    Active Time: 20 minutes


    Ingredients:

  • 1/3 cup dates, pitted
  • 1/2 cup macadamia nuts
  • 1/2 cup cashew pieces
  • Pinch of salt
  • 1 tablespoon honey
  • 3 tablespoons mini chocolate chips

  • Directions:

    1. Add dates, macadamia nuts, cashews, salt, and honey to bowl of food processor. Secure lid on food processor and run until the nuts are ground into a corse meal that begins to clump.
    2. Add mini chocolate chips to food processor and pulse, 2-3 times, just until chocolate is evenly distributed.
    3. Scoop a heaping tablespoonful of the mixture into your hands and roll into a ball. Repeat until all of the mixture is used.
    4. Enjoy immediately or store in an air-tight container in the fridge.