Grain-Free Strawberry Cheesecake Swirl Brownies
/
Let's all take a deep breath, ok? Right now...
...there. Let's do that more. Let's make brownies, take deep breaths, and simply be here.


These brownies are made for the moments between sprints, when you're home alone in your kitchen and just want to play with your food. Hand folding batter, watching ingredients whisk together, and pulling your finished product from the oven: that's the deep breath you need after a long day; that's nourishment for your soul.


Anthony's Goods provided me with product to cook with, but this recipe and these opinions are all my own. Working with brands to develop wholesome recipes is one way I keep Foraged Dish going! Anthony's Goods helps me stock the pantry and keep the blog going.
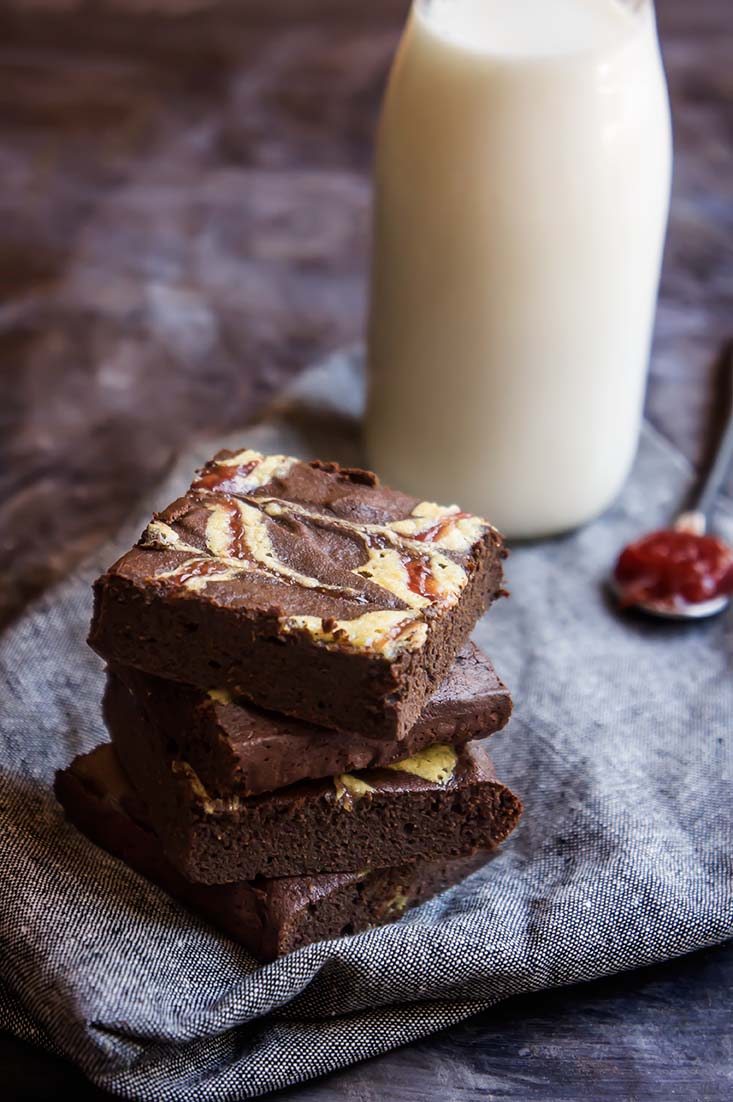
Grain-Free Strawberry Cheesecake Swirl Brownies
A rich and fudgy brownies with a cheesecake and strawberry swirl, great for Valentine’s Day or any day!
Yields: 9 | Total Time:
Ingredients:
- 1/2 cup melted coconut oil
- 1/2 cup cocoa powder
- 2 oz semi-sweet chocolate (Or a dark chocolate bar)
- 1/4 cup honey
- 2 eggs, room temperature
- 1 tablespoon brewed coffee, cooled (optional, but recommended)
- 1 teaspoon vanilla extract
- 1/4 cup coconut flour
- 1/2 teaspoon salt For the cheesecake swirl
- 3 ounces cream cheese, at room temperature
- 2 tablespoons melted coconut oil
- 2 tablespoons honey
- 1 egg
- 1/2 teaspoon vanilla extract
- 2 tablespoons strawberry jam (I used an all-fruit variety)
Directions:
- Preheat oven to 350° and line a 8x8 baking dish with parchment paper. Grease parchment with coconut oil.
- In a small sauce pan, combine melted coconut oil, cocoa powder, and chocolate. Heat over low heat, stirring until most of the clumps have melted. Remove from heat and allow to sit until entire mixture is smooth and melted.
- Scrape mixture into a mixing bowl. Using electric beaters, stir in honey. Add eggs, coffee, and vanilla and beat again. Mixture should begin to thicken. Add coconut flour and salt. Beat until smooth.
- Spread batter in even layer in baking dish.
- Make cheesecake swirl: Beat together the cream cheese, coconut oil, honey, egg, and vanilla until creamy and smooth.
- For swirl: Fill a zip lock bag with the cream cheese mixture. Snip off just the very tip of the bag, and pipe mixture in thin lines over brownie batter. Repeat with the strawberry jam. Then, using a toothpick or chopstick, make swirls through the batter. Here is a video of me making my swirls.
- Place pan in oven and bake 20 minutes, until brownies are puffy, and a knife comes out clean when inserted in the middle. Allow to cool for 15 minutes before slicing. Store in covered in fridge after first day.