Power Cookies

Power Cookies

Last night, the snow fell as over-sized flakes and we tried to catch them on our tongues, like we were 5 years old. Just two days ago, I was in a tank top looking for a mountain bike trail. This is Colorado springtime.

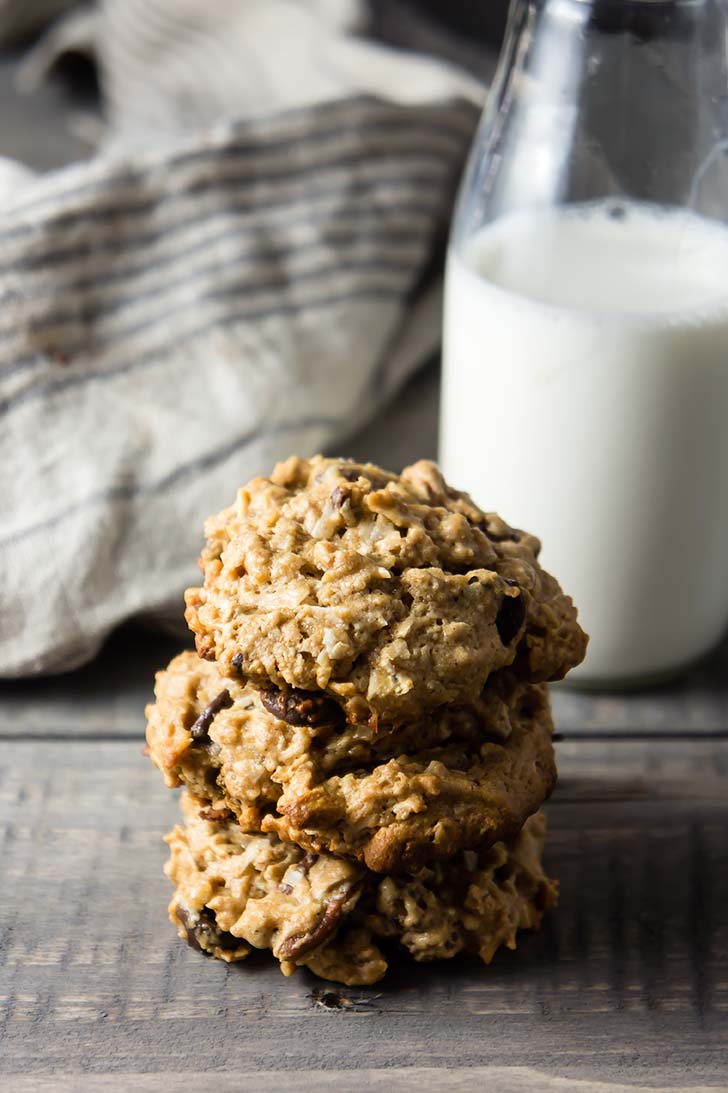
These Power Cookies enjoy all sorts of outings and fare well through all sorts of weather: throw them in your day bag for a hike, or munch on them while riding the ski lift. They are jam-packed with ingredients to give you energy. Peanut butter, oats, chocolate chips (how could I not include chocolate chips?) pecans, and coconut. That's why they're perfect for the Trail Snacks recipe series I'm working on! 

Why is it called a “Power Cookie?”

This cookie recipe sits somewhere between granola bar and cookie. But if you've ever made granola bars you know that they call for a lot (a lot a lot) of sugar in the form of honey, maple syrup, or (usually) rice syrup. That syrup is all there is to hold everything together. And don't get me wrong -- it's delicious! And there are some genius recipes that don’t call for quite as much sugar. But many have so much sugar, they are far too sweet for me. THESE cookies get the help of an egg, peanut butter and some almond meal, which helps them stick together without half as much syrup. YES: more whole foods, less processed syrup. 🙌 So, it’s a power-bar slash cookie, making the final results a Power Cookie.

Power Cookies

I mentioned my friend Brian (Sports Nutritionist and author of Climbing Nutrition) in my first post in this Trail Snack series -- Mocha Almond Energy Bites - and he has some really well-explained and thoroughly researched articles on how to get the most out of your food while you're out climbing (or doing whatever it is you love to do). 

But, these Power Cookies are really inspired by my dad, who was the first person I knew to make a "energy cookie." He had a recipe similar to this on top of his fridge, in an over-stuffed manila folder. When I started baking a lot on my own (some time in high school), Power Cookies were one of the things I would make. This recipe is different -- the original is lost to me - but similar enough to be given the name "Power Cookies." 

Hope you enjoy, whether you take them on an adventure or eat them right here at your computer, while they're still warm! (They are good either way — you do not need to be out and about to enjoy these. They make a GREAT mid-afternoon power up when you start feeling that 3pm slump, and since they are not so syrup-heavy, they keep you going longer, with real nutrients).

Power Cookies

Power Cookies

Published March 27, 2018 by
   |     Print This Recipe

Serves: 24 cookies   |    Total Time: 20 minutes


Ingredients:

  • 1/2 cup nut butter (try peanut butter, almond butter, or cashew butter)
  • 1/4 cup honey 
  • 1/4 cup melted butter
  • 2 eggs 
  • 1 teaspoon vanilla extract
  • 1 teaspoon cinnamon (optional - the cinnamon flavor comes through, so if you do not like cinnamon, skip it!) 
  • 1/2 teaspoon baking powder 
  • 1/2 teaspoon baking soda
  • 1/4 teaspoon salt 
  • 1 cup rolled oats 
  • 1 cup shredded, unsweetened coconut
  • 1/2 cup almond flour
  • 1/2 cup pecan pieces
  • 1/2 cup chocolate chips 

Directions:

  1. Preheat oven to 350°F.
  2. In a large mixing bowl, cream together the nut butter, honey, butter, eggs, and vanilla using an electric mixer until smooth.
  3. Add optional cinnamon, baking powder, baking soda, and salt to the bowl, and beat into wet ingredients until incorporated.
  4. Now, add the rolled oats, coconut, almond flour, and mix until a stiff batter forms. Use a spatula to scrape the sides of the bowl as needed. Fold the chocolate chips and pecans into the batter.
  5. Scoop the batter by the heaping tablespoonful onto a cookie sheet fitted with parchment or a Silpat (affiliate link!). Cookies will not spread as they bake, so flatten them slightly with the back of a spoon.
  6. Place in center wrack of oven and bake for 8-12 minutes. Cookies will be golden on the edges, but still soft—they will continue to set as they cool. Allow to cool 5-10 minutes before serving.

2 Comments

Grain-Free Peanut Butter Blondies

Grain-Free Peanut Butter Blondies

These peanut butter blondies are my favorite thing today this month.

Do you like peanut butter cookies? Do you love peanut butter cups? These are for you. ❤️

How these sweet peanut butter blondie babies came to be: A looooong time ago, I went on a hunt for a grain-free peanut butter cookie recipe. I have a few of these recipes stashed away, and have tweaked them and toyed with them until I found my go-to combination of ingredients. The cookies themselves call for only 6 ingredients, which is good because it means late-night cookie cravings are easy to quench (you know, good but also bad 😆).

And those six ingredients? You probably have them in your pantry right now: peanut butter, salt, vanilla, almond flour, honey and (in your fridge) an egg.

✨ Do you know what makes you feel like Wonder Woman (or Superman)? When you hear the words "I could really go for a cookie right now," and then you magically pull a fresh batch of cookies from the oven in 30 minutes. ✨

It’s possible with these bars. Cheers to that!

Grain-Free Peanut Butter Blondies

When they are fresh from the oven, these blondies are super soft, but as they cool they firm up, becoming fudgy. They melt away in your mouth… all that peanut butter goodness — oh gosh, just writing this makes me want to make a fresh batch right away!

If you prefer cookies… You can plop the dough by the spoonful on the a cookie sheet, but I have found that they're even better as bars (AKA blondies), because it gives them the ultimate fudgy center. Also, it’s less work (hoorah for that!).

These peanut butter bars are the household favorite around here — everyone is excited when these come out of the oven.

AND if you’re thinking, I do love cookies — but I don’t need all that sugar right now. WELL GET READY, because these call for 1/3 cup honey! That's it. No refined sugar. Cut into 9 squares, each bar has less sugar than a LÄRABAR or even an RXBar. So bake away my friends! These cookie bars will change your life. They certainly have changed mine.

Salted Fudgy Grain-Free Peanut Butter Blondies

The finishing touch on these bars is a sprinkle of salt. While I was in Monterey last month, I came by some fancy salts that were 75% off. Normally I'd resist the urge to buy luxury salt, especially when flying Frontier Airlines with nothing but a "personal item" (uuugh). But 75% off was too much to pass up. 

These blondies are sprinkled with the coffee infused salt, but you can use any salt and get delicious results. You can even play around with sprinkling different salts on top, and decide which you like the most! I sprinkled my most recent batch of these cookies with vanilla salt (affiliate link!) and it was stellar. Try fluer de sel (affiliate link!) or even make your own coffee-infused salt.

Salted Fudgy Grain-Free Peanut Butter Blondies

Grain-Free Peanut Butter Blondies

Published January 25, 2018 by
   |     Print This Recipe

Serves: 16   |    Total Time: 35 minutes


Ingredients:

  • 1 cup peanut butter (smooth, natural & organic— stir it well)
  • 1 egg
  • 1/3 cup honey
  • 1 teaspoon vanilla extract
  • 1/2 teaspoon salt

  • For the chocolate drizzle:
  • 1 ounce chocolate (I used a chopped up 88% dark chocolate bar, but use whatever you like most)
  • 1 sprinkle finishing salt, such as vanilla salt (affiliate link!), fleur de sel (affiliate link!), espresso salt (affiliate link!), or homemade coffee salt

Directions:

  1. Preheat oven to 350°F and line a 9x9 inch glass baking dish with parchment paper.
  2. In a medium mixing bowl, combine peanut butter, egg, honey, vanilla, and salt. Stir until completely combined and smooth. Dough should be quite sticky, but not runny: when you lift a spoonful from the bowl it should not drip.
  3. Press dough into prepared baking dish in an even layer. Then, place baking dish in oven and bake for 20-23 minutes. The blondies should be puffed in the middle, and golden on the edges. They’ll still be quite soft at this point. Allow blondies to cool in pan for 10 minutes.
  4. While to blondies are cooling, make the chocolate drizzle: place chocolate in a microwave-safe bowl. Heat for 30 seconds and stir. Then, heat for 15 seconds, and stir, repeating (heat for 15 seconds, stir) until chocolate is completely melted and glossy. Use a spoon to drizzle the chocolate over the bars in a criss-cross pattern. Now, sprinkle with finishing salt of your choice. Allow to cool 5 more minutes.
  5. Slice blondies into squares, and serve. Store in an airtight container for up to a week.

2 Comments

Paleo Chocolate Turtle Bars with Honey Caramel

Paleo Chocolate Turtle Bars with Honey Caramel

This recipe started with a single sweet craving for caramel. I wanted it silky and coating apples as soon as the first days of fall hit. I wanted it chewy, lightly salted, and wrapped in little wax papers. Then, I wanted it gushing out between layers of chocolate. That's when I gave in. 

There is nothing like Halloween to get your sweet tooth going. I used to be a total sucker for those sugary fruit-flavored candies you would fill pillow cases with as a kid, but now I'm more for anything chocolate (which you might already know, just from perusing the dessert section of this site). Visions of chocolate layers is probably what ultimately did me in with that caramel craving.  

Paleo Chocolate Turtle Bars with Honey Caramel

A word of warning: this caramel is ooey-gooey. Like, if you plan on taking the whole batch of bars out of the pan at once, make sure you have a plate or napkins handy. That ooey-gooey deliciousness can get a little sticky! But see all of those caramelly drips? They are what make this so sinfully good. Exactly what you'll want to dig into when you sit down to watch a scary movie tonight, or what you'll want to munch on between answering the door for trick-or-treaters.

But they're also not a Halloween exclusive--if you ask me, caramel and chocolate fit well with just about any holiday you name, even if that holiday is I-just-freakin-want-a-treat-right-now day. (Note: they are really good on those days. I know, because I had a few recently.) 

Paleo Chocolate Turtle Bars with Honey Caramel

Paleo Chocolate Turtle Bars with Honey Caramel

Published October 31, 2017 by
   |     Print This Recipe

Serves: 20   |    Total Time: 1 hour 15 minutes


Ingredients:


    For the Crust:
  • 2 cups almond flour 
  • 1/4 cup coconut flour
  • 1/4 cup cocoa
  • 1/4 teaspoon salt 
  • 1/4 cup honey
  • 1/4 cup butter

  • For the Caramel:
  • 1 can (14 ounce) coconut milk
  • 1/2 cup mild flavored honey 
  • Pinch salt
  • 1 tablespoon butter
  • 1 teaspoon vanilla 

  • For the top:
  • 1 cup chocolate chips 
  • 1 tablespoon butter
  • 20 whole pecans 
  • 1 teaspoon sea salt or flake sea salt

Directions:

  1. Preheat oven to 375°F and line a 9x9 glass baking dish with parchment paper.
  2. Then, make the crust. In a medium mixing bowl, combine dry crust ingredients and whisk to minimize clumps. Then, in a small bowl, melt honey and butter. Pour melted butter and honey into dry mixture and stir with a spatula until a crumbly dough forms. It should stick together when you squeeze it between your pointer finger and thumb. Press the dough into the bottom of the prepared 9x9 pan in an even layer. Then, bake for 8-9 minutes, until fragrant. Set aside to cool.
  3. Next, make the caramel. Add coconut milk and honey to a heavy-bottomed sauce pan. Bring to a gentle boil. While the stove heats, pour cold water into a medium side bowl or glass and set near by. Cook caramel at a gentle boil, and stir constantly, until it reaches the soft ball stage. Then, remove from heat, and stir in vanilla, butter and salt. Allow caramel to cool 5 minutes.
  4. Once the caramel has cooled for about 5 minutes (careful, it will still be a bit warm), pour 1/2 to 3/4 cup caramel over the crust, and spread into an ever layer. Place in fridge to allow caramel to set further.
  5. While caramel sets, make the chocolate topping: heat chocolate chips and butter in the microwave for 30 seconds, and stir, and then heat again for 30 seconds, repeating process until chocolate is smooth and no chips remain (You can also do this in a double boiler). Working quickly, remove caramel bars from fridge, and drizzle chocolate over top (see note below). Spread in an even layer using a spatula. While chocolate is still setting, arrange pecans on top and sprinkle with salt. Return to fridge until chocolate has set (about 10 minutes), and then slice into 20 rectangles to serve.
  6. Note: if your caramel is a bit runny, you can place it in the freezer to help it set more before you add the chocolate. When you do add the chocolate, the cold caramel will make it set even quicker, so work in small batches, spreading on part of the chocolate at once.

Paleo Chocolate Turtle Bars with Honey Caramel
10 Comments