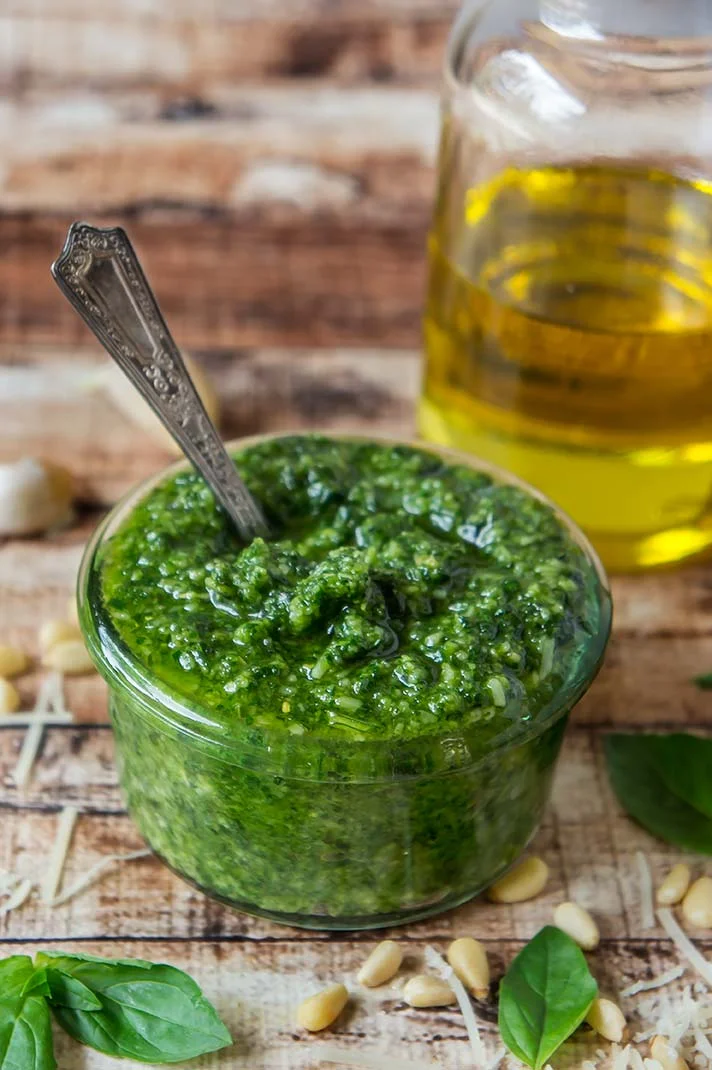
Easy Food Processor Pesto

After posting my eleventh recipe that called for pesto to this blog (Pesto Zoodles with Fresh Peas and Bacon), I decided it was high time I actually post a recipe for pesto itself. Watch below or click here to watch the recipe video! Scroll past the video for some images and the full recipe. 

Pesto is a glorious, glorious thing. Ancient Romans were on to something when they started mashing herbs with garlic, cheese and oil. Can you imagine being the chef to first pull out your moral and pestle, fill it with herbs and nuts, only to yield a greenish glop that looks unlike any other sauce you'd seen? And then the first bite! What do you think they thought?

Easy Food Processor Pesto

Of course, times have since changed dramatically. Basil wasn't the star of pesto sauce until 1863 (according to Wiki), and wasn't even popular in the US until the 1980s and 1990s. Which, I suppose, explains a lot: as a 90s kid, I was set up to love pesto from the beginning. And now here I am, making pesto in a food processor. (Many will tell you this is not the traditional way, and they are right: in ancient Rome they didn't have food processors... or electricity. This food processor method is the 21st century way. I've made many a batch of pesto in a mortar and pestle, but for a big batch, I always go for the food processor). 

When I have a fresh batch of pesto in the fridge, I fearless add it to every meal. A condiment for potatoes (a sauce for sweet potatoes, or just a dip for some roasted yukon golds). The creamy base for this chicken dish. Shmeared inside of a cheesy omelette. I even put the stuff straight on steamed broccoli, or stir a tablespoon of pesto with a tablespoon of lemon juice to make a vinaigrette. You get the picture. 

Easy Food Processor Pesto

Easy Food Processor Pesto

Published July 11, 2017 by

Serves: 4   |    Total Time: 10 minutes


Ingredients:

  • 2 cloves garlic
  • 1/2 teaspoon sea salt
  • 1/4 cup pine nuts
  • 1/2 cup grated parmesan
  • Zest from 1/2 a lemon
  • 6 cups basil
  • 1/4 cup olive oil

Directions:

  1. Pulse garlic in food processor with salt until minced.
  2. Add pine nuts to food processor, and pulse three times. Add parmesan and lemon zest to food processor, and pulse until a meal forms.
  3. Add basil and oil to the food processor and pulse until the basil and minced evenly. Scrape the sides with a spatula and pulse again briefly.
  4. Store in an air-tight container in the fridge until ready to use. Will last up to 1 week in the fridge.

FOR NUT-FREE: Substitute 1/4 cup sunflower seeds for 1/4 cup pine nuts.

FOR DAIRY-FREE: Substitute 2 tablespoons nutritional yeast for 1/2 cup parmesan.

Easy Food Processor Pesto
1 Comment

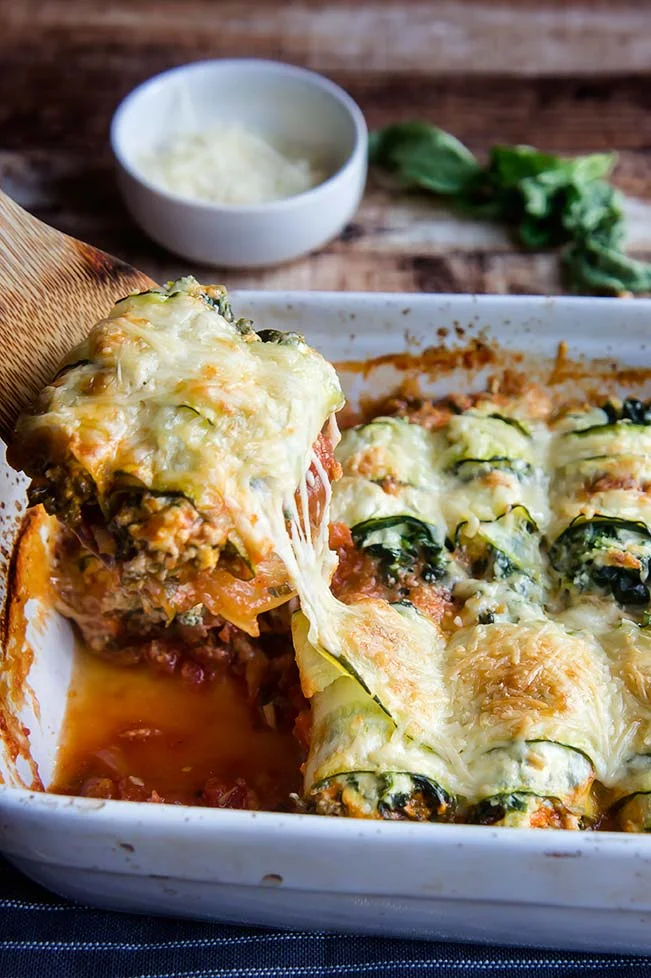
Zucchini Ricotta Manicotti

Zucchini Manicotti

When you pull this casserole out of the oven, the first thing you'll see is bubbling cheese, that tempts you even when it is too hot to eat. Then, only seconds later, a hot steam that carries the smell of fresh basil and ripe tomatoes hits you. By the time the dish makes in to the counter, the sizzling begins to slow. With in a few minutes the dish sits still. It begs for you, even now when it would burn your tongue. (Maybe you sneak a bite anyways).  

By now the whole house has smelled like home cooked Italian food for 20 minutes or more, and people are beginning poke their heads into the kitchen. Is it ready? Can we eat yet? What are you up to in here? 

2overheadtight.jpg
Zucchini Manicotti

Cheese. Wine. More cheese in the form of ricotta. That is what you are up to. This recipe is pretty much everything. If your "everything" is ooey, gooey, and delicious, that is. And somehow folded in there is a pile of vegetables too: zucchini for noodles, spinach folded in with the ricotta, and a homemade tomato sauce that will make you proud.

This is a pile of cheesy Italian flavor you'll feel really good about eating. Despite begin literally stuffed with cheese, this recipe is light: it doesn't leave you feeling groggy the way this dish would if it was made with traditional pasta. We serve it with extra marinara sauce (I love homemade marinara sauce) and a side salad, and call it a meal. Oh--and don't forget the glass of wine! Red is perfect for this dish. 

Zucchini Manicotti
Zucchini Manicotti

If you're worried about the logistics of wrapping a bunch of cheese in thinly sliced zucchini, I don't blame you! But it's even easier than I originally thought it would me, so watch the video below to see how this impressive dish comes together, and you'll see you have nothing to worry about!

Music: www.bensound.com

Zucchini Ricotta Manicotti

Paleo, Primal, Grain-Free    |       

Zucchini is cut thin and rolled around ricotta as a stand in for traditional manicotti!

Serves: 4   |    Total Time:


Ingredients:

  • 2 medium zucchinis
  • 1 egg
  • 1-1/2 cup ricotta
  • 1 cup grated parmesan, split in half
  • 1 8-ounce package frozen spinach, thawed
  • Salt & pepper


  • For sauce:
  • 1/2 yellow onion
  • 1 tablespoon avocado oil
  • 3 cloves garlic
  • 1 14-ounce can crushed tomatoes
  • 1/4 cup red wine
  • 2 tablespoons fresh basil, minced - plus more for garnish
  • 1 teaspoon oregano
  • Salt & pepper

Directions:

  1. First, make the marinara sauce: heat avocado oil in a sauce pan over medium heat. Dice white onion, and mince garlic. Add both to sauce pan once oil is hot, and sauté until the onion is translucent and the garlic begins to brown. Pour wine into pot, and use a wooden spoon to scrape any brunt pieces from the bottom of the pot. Allow to simmer, then add tomatoes. Stir. Add oregano and basil, and then season with salt & pepper to taste. Remove from heat.
  2. Spread 1/2 of sauce in the bottom of a 9x9 baking dish.
  3. Make the ricotta filling next. Place thawed spinach in a fine mesh sieve and squeeze out any excuses water. Place in a mixing bowl, and combine with ricotta, 1/2 cup grated parmesan, egg, and a few sprinkles of salt and freshly cracked pepper. Stir until combined.
  4. Preheat oven to 400°F and assemble: use a potato peeler or mandolin to slice the zucchini in long, thin strips (watch the video above to see an example). Place two zucchini strips on a flat surface so that they overlap by about 1/2 an inch. Spoon about 2 tablespoons of the ricotta mixture on the short edge of the zucchini strips, and then roll up the zucchini strips around the ricotta like a roll of sushi. Place in the baking dish. Repeat until you run out of ricotta.
  5. Sprinkle the remaining parmesan over the manicottis and place in oven. Bake for 30-35 minutes, until cheese is gooey, and sauce is bubbly. Allow to cool for 10 minutes before serving. Sprinkle with fresh basil as garnish. I also serve with extra sauce (the remaining 1/2) because I love marinara sauce!
  6. Note: I find that when I get to the middle of the zucchini, it becomes hard to slice because of the seeds, so I move on to the second zucchini and reuse the middle of each zucchini later for another meal.

Let's hang out! Find me on social:

What more recipes like this one? Sign up for the Foraged Dish newsletter! 

22 Comments

Lady Grey Tea Dark Chocolate Truffles

Earl Grey Truffles

The afternoon feels long and slow today. My desk by the window is letting a warm (slightly too warm) light in, despite a howling wind on the other side. I'm not one to let sleep go by the wayside, so despite a full nights rest, I'm feeling rather drowsy. 

I reach for a bag of tea, and heat up some water. It's too late for coffee, but tea and a truffle will wake me up a bit (that's the hope, at least). I grab a truffle, and take a bite. 

Earl Grey Truffles
Earl Grey Truffles

With the chocolate still in my mouth, I take a swig of tea, and let its warmth melt the truffle in my mouth. It is rich, but there are light notes of flowers and bergamot. This is probably the perfect time to enjoy a truffle: a moment when you have nothing to think about other than what it tastes like. 

Earl Grey Truffles
Earl Grey Truffles

I've made these truffles twice this month and am going to keep making them. They appeal perfectly to my inner chocoholic but are simple, and easy to put together... just watch below! They're the perfect last minute Valentine's Day gift (that's today!!) or indulgence for your every day (that's tomorrow!)

Happy day to everyone! 

P.S., I'm still super new to this video thing! What do you guys think? Do you like seeing Foraged Dish recipes in video form? Any tips or suggestions? 

Lady Grey Tea Dark Chocolate Truffles

Paleo, Primal, Gluten-Free, Grain-Free    |       

Lady grey tea lends a faint but floral note to these truffles.

Yields: 16   |    Total Time:


Ingredients:

  • 1/2 cup cream
  • 2 tablespoons butter
  • 2 tablespoons loose leaf lady grey tea (you could also use 2 tea bags )
  • 1/16 teaspoon salt
  • 8 oz semi-sweet chocolate (chopped up bar or chips; I have used Guittard and Ghirardelli and they are both great!)
  • 1/2 teaspoon vanilla
  • 1/2 cup cocoa powder

Directions:

  1. Heat cream over medium heat while stirring continuously until it begins to simmer. Remove from heat, add tea and stir. Allow to sit for 5 minutes.
  2. In a medium-sized mixing bowl, combine chocolate, salt, butter, and vanilla. Strain cream through a fine-mesh sieve into the mixing bowl. Allow the warm cream to warm the chocolate by letting it sit for 5 minutes.
  3. Use a spatula to stir the mixture until it is smooth. If needed, heat the mixture in the microwave at 10 second intervals to melt the chocolate further. After stirring for about 10 minutes, you should get a thick, glossy ganache. Scrape mixture into a tupperware and place, covered, in the fridge for at least 1 hour.
  4. After chilling, the ganache should become firm, but remain somewhat malleable. Use a spoon and your hands to roll the ganache into spheres.
  5. Pour cocoa powder in a bowl or deep plate and toss each truffle in cocoa. Serve immediately or store in an air-tight container in the fridge.

4 Comments