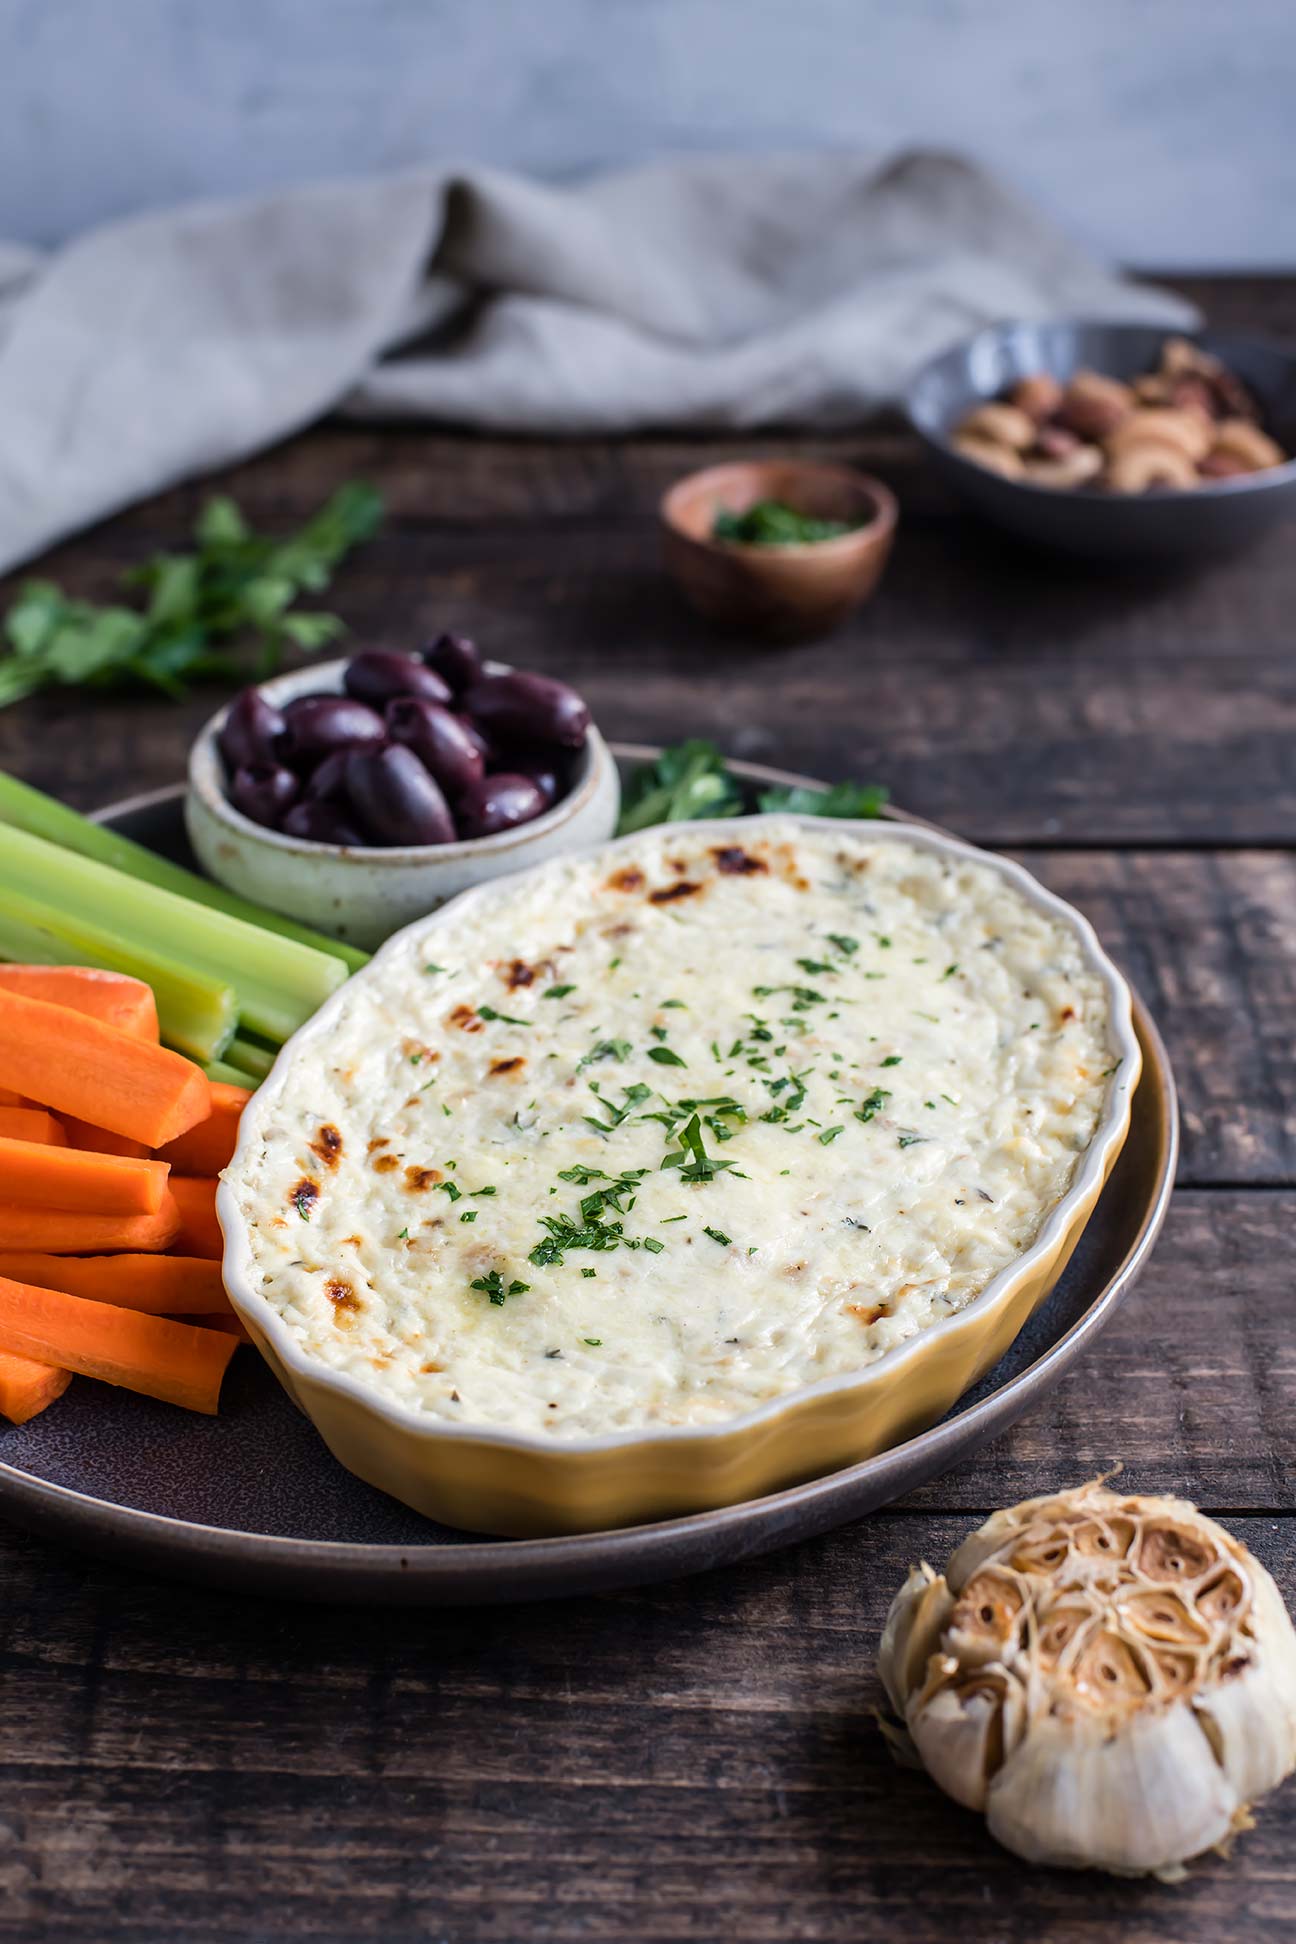
Warm Gruyère, Roasted Garlic & Thyme Dip

Warm Gruyère, Roasted Garlic & Thyme Dip

It is about 21°F this morning. The cold always me makes me crave crave warm, cozy dishes. This gruyère, roasted garlic and thyme dip  is just the thing to take to a New Years Eve cocktail party, or simply enjoy on the sofa after a long day, with your feet kicked up (build a fire in that fireplace, while you’re at it!).

I went to a cocktail party this fall (potluck style), and there were at least three different spinach and artichoke dips! Tasting and comparing them all was fun, but really? Three versions? Seems everyone was on the same page that night. I LOVE spinach artichoke dip, and this dip hits the same craving but mixes it up a bit.

Warm Gruyère, Roasted Garlic & Thyme Dip

The first step in this recipe is to roast a whole head of garlic. Have you roasted garlic before? YUM. It becomes golden and soft and spreadable. I roasted an extra head of garlic while I was making the one for this dip just so we could have it. It makes the best garlic garlic bread or compound butter. You may as well make the most of having the oven on!

Surprisingly, even with a whole head of garlic in this dip, it’s a subtle flavor — not a “I’m going to be breathing garlic for the rest of the night,” flavor. The gruyère and cream cheese soften it. Thyme adds an herbaceous note. The leftovers (if you have leftovers — in the realm of cheese that’s a rare story) do well as a sandwich spread or tucked inside of an omelette with sautéd mushrooms.

Warm Gruyère, Roasted Garlic & Thyme Dip

The new year is almost here! Wishing everyone a joyful 2019!

Warm Gruyère, Roasted Garlic & Thyme Dip

Published December 7, 2018 by
   Print This Recipe

Serves: 6   |    Active Time: 75 minutes


Ingredients:

  • 1 head of garlic
  • 1 teaspoon olive oil or avocado oil
  • 8 ounces sour cream, at room temperature
  • 2 ounces cream cheese
  • 2 ounces gruyère, finely grated, plus 2 tablespoons for topping
  • 1/8 teaspoon salt
  • 1/4 teaspoon freshly cracked black pepper
  • 1 teaspoon fresh thyme leaves
  • 1 tablespoon minced parsley for garnish
  • For serving: crudités, crackers, crusty bread, etc.

  • Directions:

    1. First, roast the garlic: preheat oven to 350° F. Chop the very top off of the head of garlic. Place on a baking sheet and drizzle with the olive/avocado oil. Place in oven and roast 45 minutes, until cloves are golden and soft.
    2. Allow garlic to cool until you can easily touch it without burning your hands, about 15 minutes. Squeeze garlic cloves into a medium-sized mixing bowl, discarding of the garlic papers. Mash garlic.
    3. Add sour cream, cream cheese, 2 ounces gruyère, salt, black pepper, and thyme to bowl. Use a fork to mix until well combined.
    4. Spread cheese mixture in a ramekin or cocotte dish. Do not over fill—make sure there is at least 1/4-inch of extra room in the dish to avoid bubbling over. Top with remaining 2 tablespoons gruyère, and place in oven and bake for 20-25 minutes, until cheese is bubbling and just starting to brown in spots on the top.
    5. Remove from oven and allow to cool 10 minutes before sprinkling with minced parsley and serving with crudités, crackers, or crusty bread.
    6. Leftovers? Eat them cold as a spread on toast, sandwiches, etc, or re-warm the dip in the microwave for 30-second intervals or in an oven until warmed through.

    Comment

    Baked Ricotta with Blackberry-Thyme Smash

    Baked Ricotta with Blackberry-Thyme Smash

    Boise is surrounded by golden hills, many of them charred by grass fires. But don’t be deceived: just and hour north, you’ll be among the trees, an hour further and the grass turns green, and just thirty minutes more, you’ll come around the bend into McCall and spot Payette lake, backdropped by Brundage Mountain. This is where we spent the end of August— in a cabin with family. 

    We visited just two weeks after the annual huckleberry festival, but there were plenty of wild blackberries at the farmers market still, something you don’t see much of in the front range of Colorado! So of course, I had to take that inspiration and run with it— creating a massive list of things to make (yes, I do seem to have a thing for lists). And perhaps I’ll plant some berries in my yard next spring... blackberries, blueberries, and gooseberries too. 

    Baked Ricotta with Blackberry-Thyme Smash
    Baked Ricotta with Blackberry-Thyme Smash

    Between blackberries, we hit the trails, exploring the Payette Lake peninsula and Bear Basin on mountain bikes. On the hottest day, we rented a paddle board and kayak— the river north of town is breathtaking. 

    McCall is truly a gem of a mountain town! Outdoor enthusiasts— put this on your list. You get the strangest feeling riding your bike through the woods, like you’ve been transported to the Red Wood Forest, minus the heat! I'll be sharing a few pictures in my monthly newsletter in just a few days -- sign up here

    Baked Ricotta with Blackberry-Thyme Smash

    Published September 6, 2018 by
       Print This Recipe

    Serves: 6-8   |    Active Time: 40 minutes


    Ingredients:

    Baked Ricotta:
  • 2 cups of full fat ricotta
  • 1 egg
  • 1/4 cup tablespoons Parmesan (divided in 2 parts)
  • Zest of 1 lemon
  • 2 garlic cloves, minced
  • 1/4 teaspoon salt
  • A few cracks pepper
  • 1 tablespoon olive oil

  • Blackberry-Thyme Smash:
  • 1 1/2 cups fresh blackberries, divided
  • 3 sprigs thyme, plus more for garnish
  • Juice of 1/2 a lemon
  • Pinch of salt
  • 1 tablespoon honey
  • For serving: crackers, crostinis, and/or crudités of choice

  • Directions:

    1. Preheat oven to 350°F. Grease a 50-ounce capacity (about 3 cups) ramekin, baking dish, or cheese baker with 1 tablespoon olive oil.
    2. In a medium size mixing bowl, whisk together the ricotta, egg, 2 tablespoons of Parmesan, lemon zest, minced garlic, salt, and pepper.
    3. Using a spatula, transfer the cheese mixture to the baking dish. Sprinkle top with remaining 2 tablespoons parmesan. (Note: Do not over fill your baking dish. Make the cheese level or below the top rim of the baking dish (if needed, divide the cheese between two baking dishes. This will prevent overflow and a mess in your oven!).
    4. Place in oven, and bake for 25-30 minutes. Parmesan on top should begin to turn golden.
    5. While the cheese is cooking, make the Blackberry-Thyme Smash: place 1 cup black berries, leaves from 3 sprigs of thyme, juice of 1/2 lemon, pinch of salt, and honey in a bowl and mash with a fork until a saucy, jammy mixture is created. Add in remaining 1/2 cup whole berries (for texture).
    6. Spoon Blackberry Smash mixture over baked cheese, and top with a sprig of thyme as garnish. Serve while cheese is still warm with crackers, crostinis, or crudités.

    Comment

    Green Chile Smother Sauce

    Green Chile Smother Sauce

    This green chile smother sauce was created for a good friend after we went to a Mexican restaurant and fell in love with their smother sauce. The Mexican restaurant is a little hole in the wall across the street from the DMV. You wouldn’t think much of that little restaurant if you were just driving by, but those that know it love it. The burritos come stuffed full of ingredients, making them bigger than anyone person could ever really need. And key to this story, each burrito gets coated in smother sauce.

    What is smother sauce, you ask? Well, it’s a sauce, for smothering. But it can be used in a kajillion ways (I’ll share some ideas later in this post). Mostly, it’s a spicy sauce that you can pour over burritos, tacos, eggs—really anything. 

    After eating at this restaurant, we realized smothered burritos didn’t have to be restaurant-only food. Why not make our own smother sauce? That’s how this happened. Introducing Green Chile Smother Sauce.

    Green Chile Smother Sauce
    Green Chile Smother Sauce

    This green chili sauce is really similar to what you would use in my Pork Chile Verde. The difference is that this smother sauce can be used in 1,000,001 ways. It is a dip for chips when you want something zesty and tangy. It is the drizzle your eggs need in the morning. It is the sauce to smother every burrito, tamale, and taco with. Basically, it is everything. Still need ideas for how to use it? 

    • Green enchilada sauce (do you have leftover turkey still? Enchiladas are the answer)

    • Green eggs in purgatory

    • A hot sauce for your breakfast (fried eggs or omellete)

    • Serve as a salsa

    • Slow Cooker Pork Chile Verde (use this sauce in place of the tomatillo, onion, garlic blend that the recipe calls for: they are pretty much the same thing)

    • A starter for guacamole

    • A smother sauce for burritos

    ...just to name a few.

    The secret to making the sauce is roasting the tomatillos, onion, and garlic before you blend it up. That gives it a slow cooked smoky flavor that you wouldn’t otherwise be able to achieve. It cuts some of the tartness of the tomatillos. Then all you have to do is throw it in the blender and purée it. I use this blender (affiliate link)! And then you eat it, however you damn well please. That’s it! Easy peasy. 

    Green Chile Smother Sauce

    Green Chile Smother Sauce

    Published November 21, 2017 by
       |     Print This Recipe

    Serves: 6   |    Total Time: 20 minutes


    Ingredients:

    • 8 medium sized tomatillos
    • 4 cloves garlic 
    • 1 yellow onion
    • 1 tablespoon avocado oil
    • 2 cans hatch green chiles (I use the hot ones, but feel free to use mild if you prefer)
    • 1/2 cup cilantro 
    • 1/2 teaspoon ground black pepper
    • Juice of 1 lime 
    • 1 tablespoon ground cumin
    • 1 tablespoon ground coriander
    • 1 tablespoon dried oregano

    Directions:

    1. Preheat your over to 475°F. Peel the papery outer skins from the tomatillos, wash them, and slice them in half. Cut the onion into 4 to 6 large wedges. Arrange them all on a sheet pan along with the garlic cloves. Brush with 1 tablespoon avocado oil, and place in oven. Roast until the tops of the tomatillos are browned, 10-15 minutes.
    2. Add roasted tomatillos, onions, and garlic to a blender along with canned green chiles, cilantro, lime, spices (cumin, coriander, oregano, and optional cayenne), salt, and pepper. Puree. Mixture should be similar to a less chunky salsa.
    3. Store sauce in jars until ready to use. Stays good in fridge for 1 week.

    Comment