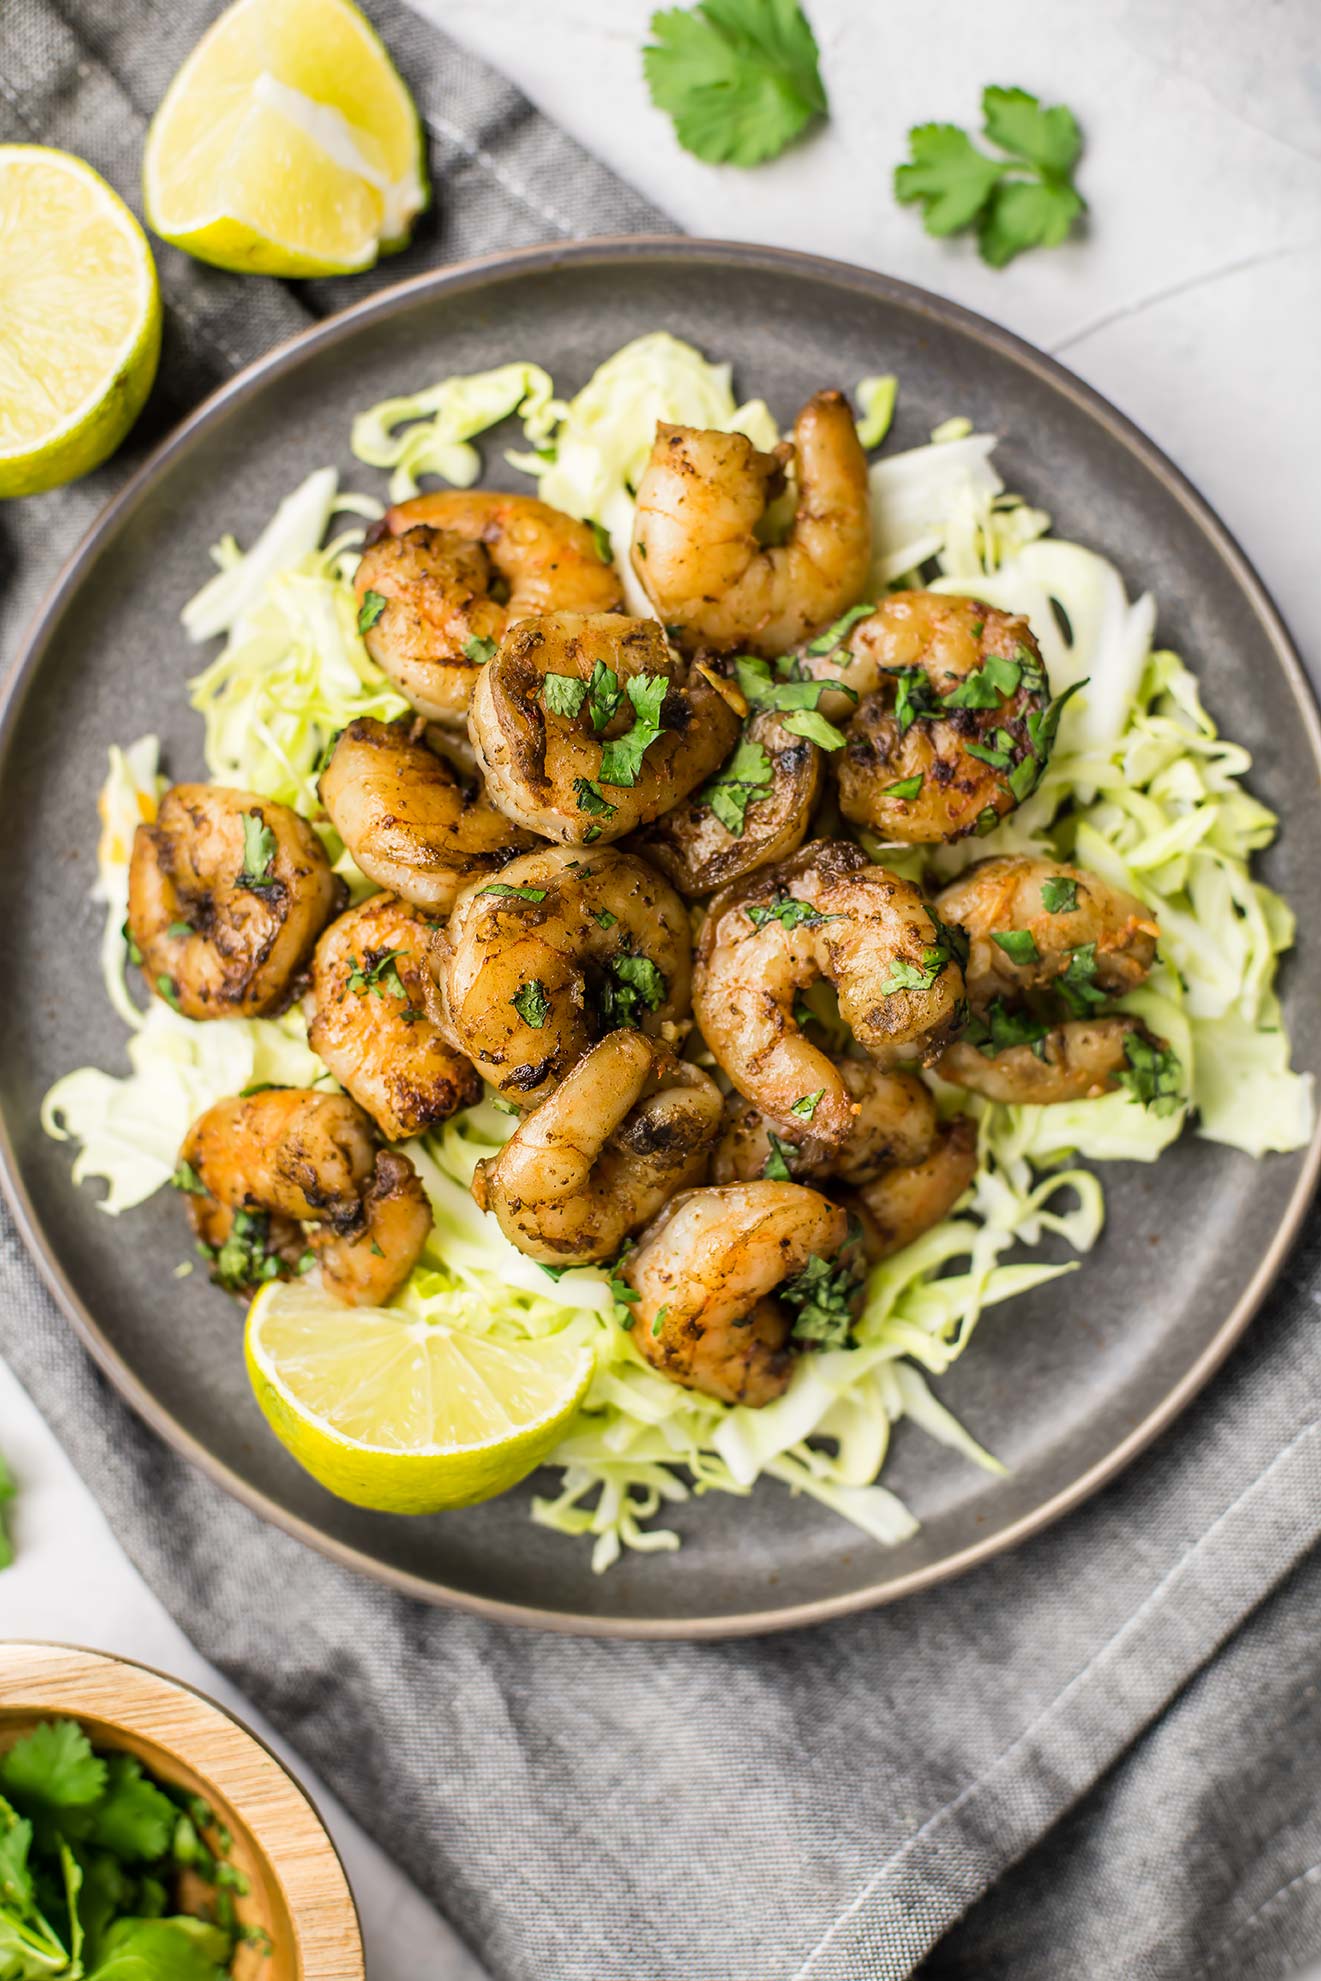
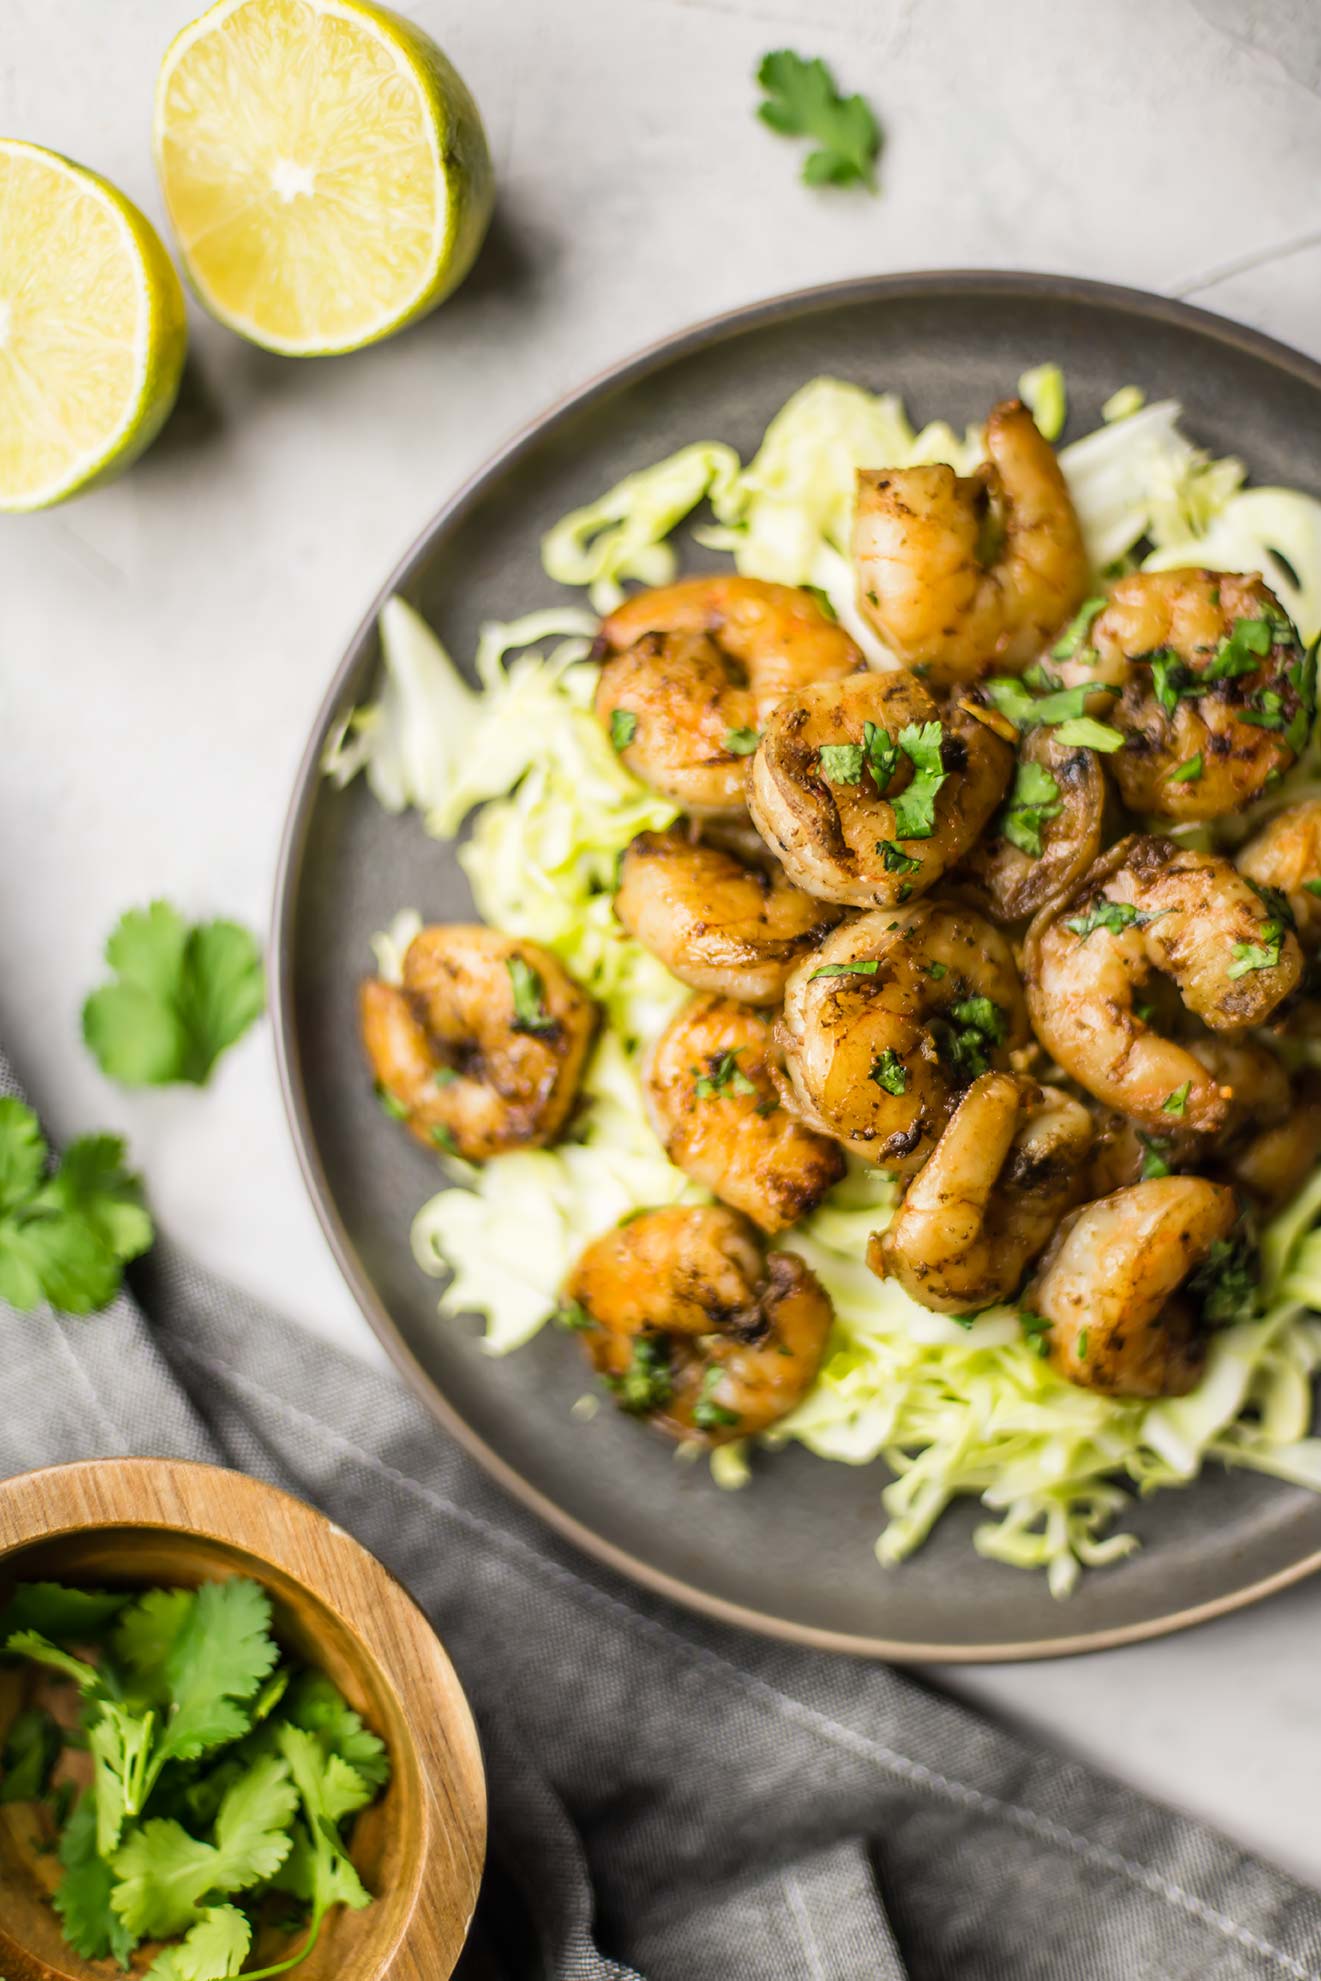
Cumin Lime Shrimp

Cumin Lime Shrimp
Cumin Lime Shrimp

This blog has come a looooong way since it’s beginning days, when I would post just whatever we were eating that day. Cumin Lime Shrimp was one of the first recipes I posted, and was just that — what we were eating that day. Now, I make sure the recipes makes sense for someone to actually include in their life. Quick to make; delicious; thoughtfully curated. So, I needed to revisit this post.

The original called for a marinade. Marinades are GREAT but I rarely plan enough to make a full-day marinade work. Even remember to pull something from the freezer to thaw in the mornings is hit or miss. Maybe I had more patience back in 2016. Or maybe as I’ve grow older I’ve become more busy. Probably both. Either way, the result is a need for more quick meals, even when I plan meals ahead for the week.

Cumin Lime Shrimp
Cumin Lime Shrimp

SO, in the new version of this recipe, you simply do everything at once, and hallelujah, shrimp cook in just a few minutes so dinner is hot on the table faster than you can get through an episode of your favorite background Netflix show.

Because the shrimp do cook fast, I recommend prepping whatever else you plan on eating for that meal before you start on the shrimp — maybe warm some tortillas, and prep a slaw, and slice avocado for quick tacos. Maybe make a salad. Just do the shrimp last so that they’re warm when you go to eat.

Cumin Lime Shrimp

Published August 2, 2016 by
   Print This Recipe

Serves: 4   |    Active Time: 15 minutes


Ingredients:

  • 1/2 pound shrimp, raw deveined and shelled
  • 2 cloves garlic, minced
  • 1/4 teaspoon paprika, ground
  • 1/2 teaspoon cumin, ground
  • Pinch of salt
  • Dash of freshly ground black pepper
  • 1 tablespoon coconut oil
  • 1/4 cup lime juice
  • 1/4 cup cilantro, minced

  • Directions:

    1. In a bowl, combine shrimp, garlic, paprika, cumin, salt, and pepper. Toss to coat shrimp.
    2. Heat coconut oil over medium-high heat. Tilt pan to coat in oil.
    3. When oil is glistening, place shrimp in pan. Do not over crowd pan — work in batches if needed. Cook shrimp for 1 minute undisturbed on first side. When shrimp begin to turn pink, flip them to the second side and cook for 1 more minute. Move cooked shrimp to a bowl, and repeat until all shrimp are cooked.
    4. Pour lime juice into skillet, and use a wooden spatula to scrape and bits from the bottom of the pan. Place coked shrimp back in pan and stir.
    5. Sprinkle shrimp with cilantro and serve hot as desired.

    Comment

    Sun Dried Tomato & Sausage "Zasta"

    Note to self: When using the spiralizer, keep your your hands on the handle. In fact, keep your hands as far from the blades as possible. Especially the day before a climbing trip. 

    Some lessons, you just have to learn the hard way! This dish was actually not the dish I was making when I sliced my finger, but just thinking about the spiralizer right now has me curling my fingers. It's okay--I'm still going to force my fingers to type out this post, because this recipe is just that delicious. What is it about those long strings that make dinner so much fun?! 

    Sun Dried Tomato & Sausage Zasta

    Published July 29, 2015 by
       Print This Recipe

    Serves: 2-3   |    Active Time: 20 minutes


    Ingredients:

  • 2 medium or 1 large zucchini
  • 2 cloves garlic, minced
  • 1 teaspoon coconut oil
  • 2-3 Hot Italian Sausages
  • 1/2 cup sun dried tomatoes in olive oil, drained
  • 1/2 cup artichoke hearts, quartered and drained
  • Sprinkle dried oregano
  • Sprinkle of red chili flakes
  • 2 sprigs fresh basil, minced
  • Salt & Pepper to taste
  • Optional, for serving: grated parmesan

  • Directions:

    1. Heat the oil in a skillet. Add the sausages and cook until done through. Remove from pan, and set aside for later.
    2. Meanwhile, spiralize the zucchini (I use this Spiralizer) (affiliate link!). Add the zucchini to the pan, along with oregano, red pepper flakes, and basil.
    3. Slice the sausages into bite-sized pieces, and return them to the pan. Place lid on pan and cook for 3-5 minutes, until the zoodles are soft.
    4. Season with salt & pepper to taste, and serve hot topped with parmesan.

    2 Comments

    Chilean-Style Ceviche

    When my plane touched down in Santiago, I let out a gasp of air. It had taken several essays, two planes, and a long visa-application process to get there. The first plane had performed an emergency landing, and by some stroke of luck the customer service rep that answered my plea for another plane ride got me on the next direct flight out of Denver. That first flight took it's toll on me though- it wasn't until I was actually in Santiago that I felt like I could breath again. Despite everything, I made it to Chile just in time to catch a ride with the other students that had flown in that day. 

    The first days are all a blur now, but it when I first met my host family, I was both relieved and completely nervous at the same time. I had no idea what it was like to live with siblings, and I had no idea where their house was (or where I was) in relation to everything else in the city. I had a map, tucked into my "Intro to Study Abroad" packet, but the actual roads clearly did not line up with those found on it. The one constant was rolling hills with inconsistently marked intersections. 

    That would all change over the course of the next three months. Not the intersections, but my feelings about them, and my ability to navigate Viña del Mar, Valparaiso, and the gap between them. I would know the sound of the fish seller trucking up and down the street to sell the catch of the day, and I would know the smell of baking hallulla at the bakery three doors down. I even got used to the hill-top view of the beach, which rolled seamlessly from city skyline in the south to dusty sand dunes in the north, though it never loss it's power to awe me, especially when the light was right. 

    After only a few months, even my cooking style had changed, influenced by Mamá Sandra (my host mom) and the long days we would spend crammed into her tiny kitchen, talking about food and the differences between Chilean cuisine and North American cuisine. I didn't get to cook much- in classic Chilean fashion, Mamá Sandra made breakfast, lunch, dinner, and once (tea time) everyday, for everyone in the house.

    With out fail, once a week Sandra would flag down the fisherman as he made his rounds through the neighborhood (or rather, he would flag her down, knowing she would pay a fair price). That night, she'd either bake the fish over onions or dice it up and toss it in lemon juice, making ceviche. 

    There's a certain intimidation factor that comes with ceviche, at least for someone that's live land locked their entire life. For some reason, until I lived with Sandra, it was an untouchable dish to be made only by pros (and my dad, who was never daunted by the intimidation factor of a dish). Three months of living in Viña del Mar cleared that up for me. I learned that classic Chilean Ceviche is pretty much a fool-proof dish, as long as you can buy fresh fish. Requirement for making this ceviche = eight ingredients, 15 minutes, and a stroke of confidence. 

    This recipe was shared on Real Food Fridays #97.

    Chilean-Style Ceviche

    Paleo, Gluten-Free, Grain-Free,    |      |    Print Friendly and PDF

    A classic South American style ceviche.

    Serves: 4 for dinner, 10 as an appetizer   |    Total Time:


    Ingredients:

    • 1 pound fresh white fish (I use tilapia)
    • Juice from 1 large lemon
    • 1 clove garlic, minced
    • 1/4 cup red onion, minced
    • 2 bell peppers, finely diced (I like to use 2 different colors)
    • 1/4 cup cilantro, minced
    • Salt & Pepper
    • Dash of cayenne

    Directions:

    1. Dice the fish into 1-cm cubes. Place in serving bowl, and drizzle with lemon juice. Cover with saran wrap and place in fridge. Allow to sit for 1 hour.
    2. Add the garlic, onion, bell peppers, and cilantro. Toss until incorporated.
    3. Season with salt & pepper, and add a dash of cayenne. Toss to distribute. Allow the fish to marinate for 30 more minutes. The fish should being to turn opaque and white (it may not be completely opaque). Serve immediately.
    4. Serving tip: ceviche is usually served with small pieces of toast (here’s a paleo recipe), crackers, chips, or toastones, but I often serve it on a piece of lettuce, like a lettuce wrap.

    13 Comments