Grain-Free Mint Chocolate Brownies

Grain-Free Mint Chocolate Brownies

“These are a treat,” I said to Oliver after taking a bite. Fudgy on the bottom, creamy in the middle, and even more chocolatey on top, these brownies are rich all the way through.

If you like York Patties, or Mint Chocolate Chip Ice Cream, or Andes Mints, these brownies are for you. And before I get to far… they are grain-free, gluten-free, and nut-free. Plus, they’re sweetened with honey!

Mint and chocolate is a favorite combo of mine, and when I was day dreaming of holiday baking these stayed in the forefront of my mind. They feel super festive! It wasn’t until after I had made them that I was swiping through images of a cookbook my mom made of her favorite recipes and I found mint brownies nestled in there. Somewhere in the back of my mind I suppose I remembered her brownies…

Grain-Free Mint Chocolate Brownies

Let’s start at the bottom: the brownie base is made of the same batter used in these strawberry cheesecake swirled brownies. It is a very chocolatey, batter that calls for coconut flour and a LOT of cocoa. The result is one fudgy brownie!

The next layer is a sweet mint cream cheese frosting. Most mint brownies call for buttercream here, but I’ve never been a fan of buttercream, and even as a kid I preferred cream cheese frosting. Nothing’s changed on that front! (For extra festive-ness, you can stir in a drop or two of green food coloring if you like.)

The topping is a simple chocolate ganache, making a chocolate mint sandwich that even looks a bit like an Andes Mint!

When you bite through all three layers it is rich, sweet and melt-in-your-mouth delicious… a total treat! (One night we had these with the Mint Chip Ice Cream from CoolHaus. 😍)

Grain-Free Mint Chocolate Brownies

Grain-Free Mint Chocolate Brownies

Published December 6, 2018 by
   Print This Recipe

Serves: 16   |    Active Time: 1 hour


Ingredients:

Brownie Base:
  • 1/2 cup melted unsalted butter or coconut oil
  • 1/2 cup cocoa powder
  • 1/3 cup semi-sweet chocolate chips
  • 1/4 cup honey
  • 2 eggs, room temperature
  • 1 teaspoon vanilla extract
  • 1/4 cup coconut flour
  • 1/4 teaspoon salt

  • Mint Filling:
  • 8 ounces cream cheese, room temperature
  • 1/4 cup honey
  • 1/4 teaspoon peppermint extract

  • Chocolate Ganache Topping:
  • 2 tablespoons unsalted butter or coconut oil
  • 2 tablespoons half-and-half
  • 1/2 cup semi-sweet chocolate chips

  • Directions:

    1. Preheat oven to 350°F and line a 8x8 baking dish with parchment paper.
    2. In a small sauce pan, combine melted butter or coconut oil, cocoa powder, and chocolate. Heat over low heat, stirring until most of the clumps have melted. Remove from heat and allow to sit until entire mixture is smooth and melted.
    3. Scrape mixture into a mixing bowl. Using electric beaters, stir in honey. Add eggs and vanilla and beat again. Mixture should begin to thicken. Add coconut flour and salt. Beat until smooth and no clumps remain.
    4. Spread batter in even layer in prepared baking dish.
    5. Bake for 20 minutes, until brownies are slightly puffy, and a knife comes out clean when inserted in the middle. Allow to cool for completely before topping with mint filling.
    6. Mint filling: while brownies are cooling, beat together cream cheese, honey, and mint until smooth. When brownies are no longer warm to the touch, spread cream cheese mixture over top in an even layer. Place brownies in fridge, covered, for at least one hour (or overnight! Short cutting this time will make it hard to spread the ganache over top and get clean layers.)
    7. Chocolate ganache topping: Place butter, half-and-half, and chocolate in a small sauce pan and heat over low heat, stirring constantly, until a smooth ganache is formed. Remove from heat. Spread chocolate ganache over cream cheese mixture and allow to set 10 minutes before slicing into 9-16 squares. Tip: for the cleanest cuts, rinse your knife between each slice.

    Comment

    Peanut Butter Chocolate Oatmeal Bars with Hemp & Cacao Nibs

    Peanut Butter Chocolate Oatmeal Bars with Hemp & Cacao Nibs

    Home! It is a good place to be. Home baking — even better. Especially during cookie season! Just four days out of the house over Thanksgiving break refilled my creative energy… if only I had time to cook every idea that comes to mind!

    We visited Roy, New Mexico for Thanksgiving, so instead of your traditional holiday dinner we cooked with a camp stove among friends (including some camping recipes that I’m definitely going to share here come summer: black bean and kale skillet enchiladas, an iteration of these chorizo and egg breakfast tacos, and plenty of cocoa). Not your traditional holiday, but it was perfect for me. A way to unplug, relax, and enjoy the beautiful dessert!

    Besides, I have been craving a trip to New Mexico since last Christmas when I tried to convince Oliver to go on a last minute road trip to Santa Fe (instead we spent it at home doing not much of anything).

    In anticipation of some upcoming trips, I had made these bars ahead of time, and they were the perfect mid-day snack while we were out climbing, and delicious enough to be a treat around the campfire.

    Peanut Butter Chocolate Oatmeal Bars with Hemp & Cacao Nibs
    Peanut Butter Chocolate Oatmeal Bars with Hemp & Cacao Nibs

    After baking them, I sliced them up and kept them in the freezer, and then packed them into the cooler with the rest of our supplies.

    Chocolate and peanut butter is a classic (the best!!) so when I went to make something akin to a snacking bar but more luxurious, it felt like the perfect fit. Something hearty and filling for long days outside, but something that still tastes basically like dessert (happy sweet tooth = happy me).

    Adding in hemp hearts and cacao nibs also walks this line of snack gone dessert… hemp hearts make me think granola bar, cacao nibs feel more like a treat. What you get is a treat you feel good about — and a snack for those moments when you really want a treat (and I always want my snacks to feel like treats).

    These bars also are a GREAT better-for-you option for holiday cookies. Like blondie meets oatmeal cookie meets peanut butter cup with more good stuff packed in. Which is why I’m sharing it with you now!

    Peanut Butter Chocolate Oatmeal Bars with Hemp & Cacao Nibs

    Peanut Butter Chocolate Oatmeal Bars with Hemp & Cacao Nibs

    Published November 29, 2018 by
       Print This Recipe

    Serves: 12   |    Active Time: 1 hour


    Ingredients:

  • 1 cup smooth, unsalted peanut butter (stirred and at room temperature)
  • 1 egg
  • 1/2 cup honey (you can also try maple syrup)
  • 2 teaspoons vanilla extract
  • 1/4 teaspoon fine sea salt
  • 2 1/2 cups old fashioned rolled oats
  • 1/4 cup almond flour OR all purpose flour
  • 1/2 cup roasted unsalted peanuts, roughly chopped, plus 2 tablespoons for topping
  • 1/2 cup hemp hearts
  • 1/4 cup cacao nibs
  • Optional: 1/2 teaspoon of flake sea salt for topping
  • 1 cup semi sweet or bitter sweet chocolate chips
  • 1 teaspoon coconut oil

  • Directions:

    1. Preheat oven to 375°F. Line a 9x9 glass baking dish with parchment paper.
    2. In a medium mixing bowl, combine the peanut butter, egg, honey and vanilla. Stir until smooth. Add salt, oats, almond flour, peanuts, hemp hearts, and cacao nibs and fold to create a thick, sticky, crumbly batter.
    3. Press mixture into prepared baking dish in an even layer, and bake in middle rack of oven for 15 minutes.
    4. Allow base to cool completely before adding chocolate topping. While base cools, melt chocolate and coconut oil by placing bowl in a microwave-safe bowl, and heating at 30-second intervals, stirring between each round. (You can also melt the chocolate in a double boiler).
    5. Spread chocolate in an even layer over oat base. Sprinkle with remaining 2 tablespoons chopped peanuts and 1/2 teaspoon flake sea salt. Allow chocolate to set completely.
    6. Once chocolate is set, lift the bars from the dish (pull out the parchment paper with the bars to get them out more easily) and slice into 12 equal pieces.
    7. Store in an air-tight container in the fridge or freezer.

    Comment

    Grain-Free Sandwich Cookies With Pumpkin Butter

    Grain-free sandwich cookies with pumpkin butter
    Grain-free sandwich cookies with pumpkin butter

    I have been on a kick, going back to old Foraged Dish recipes and taking new photos. It is insanely satisfying to compare the old ones to the new. Progress is difficult to measure day-by-day, but all of those days add up! I’m sure, in three years, I’ll look back at my photos from 2018 and roll my eyes. C'est la vie.

    These sandwich cookies were one of my recent victims, and since it is the season for baking and pumpkin, I thought it would be a good opportunity to update the whole post. That means a few updates to the recipe, too:

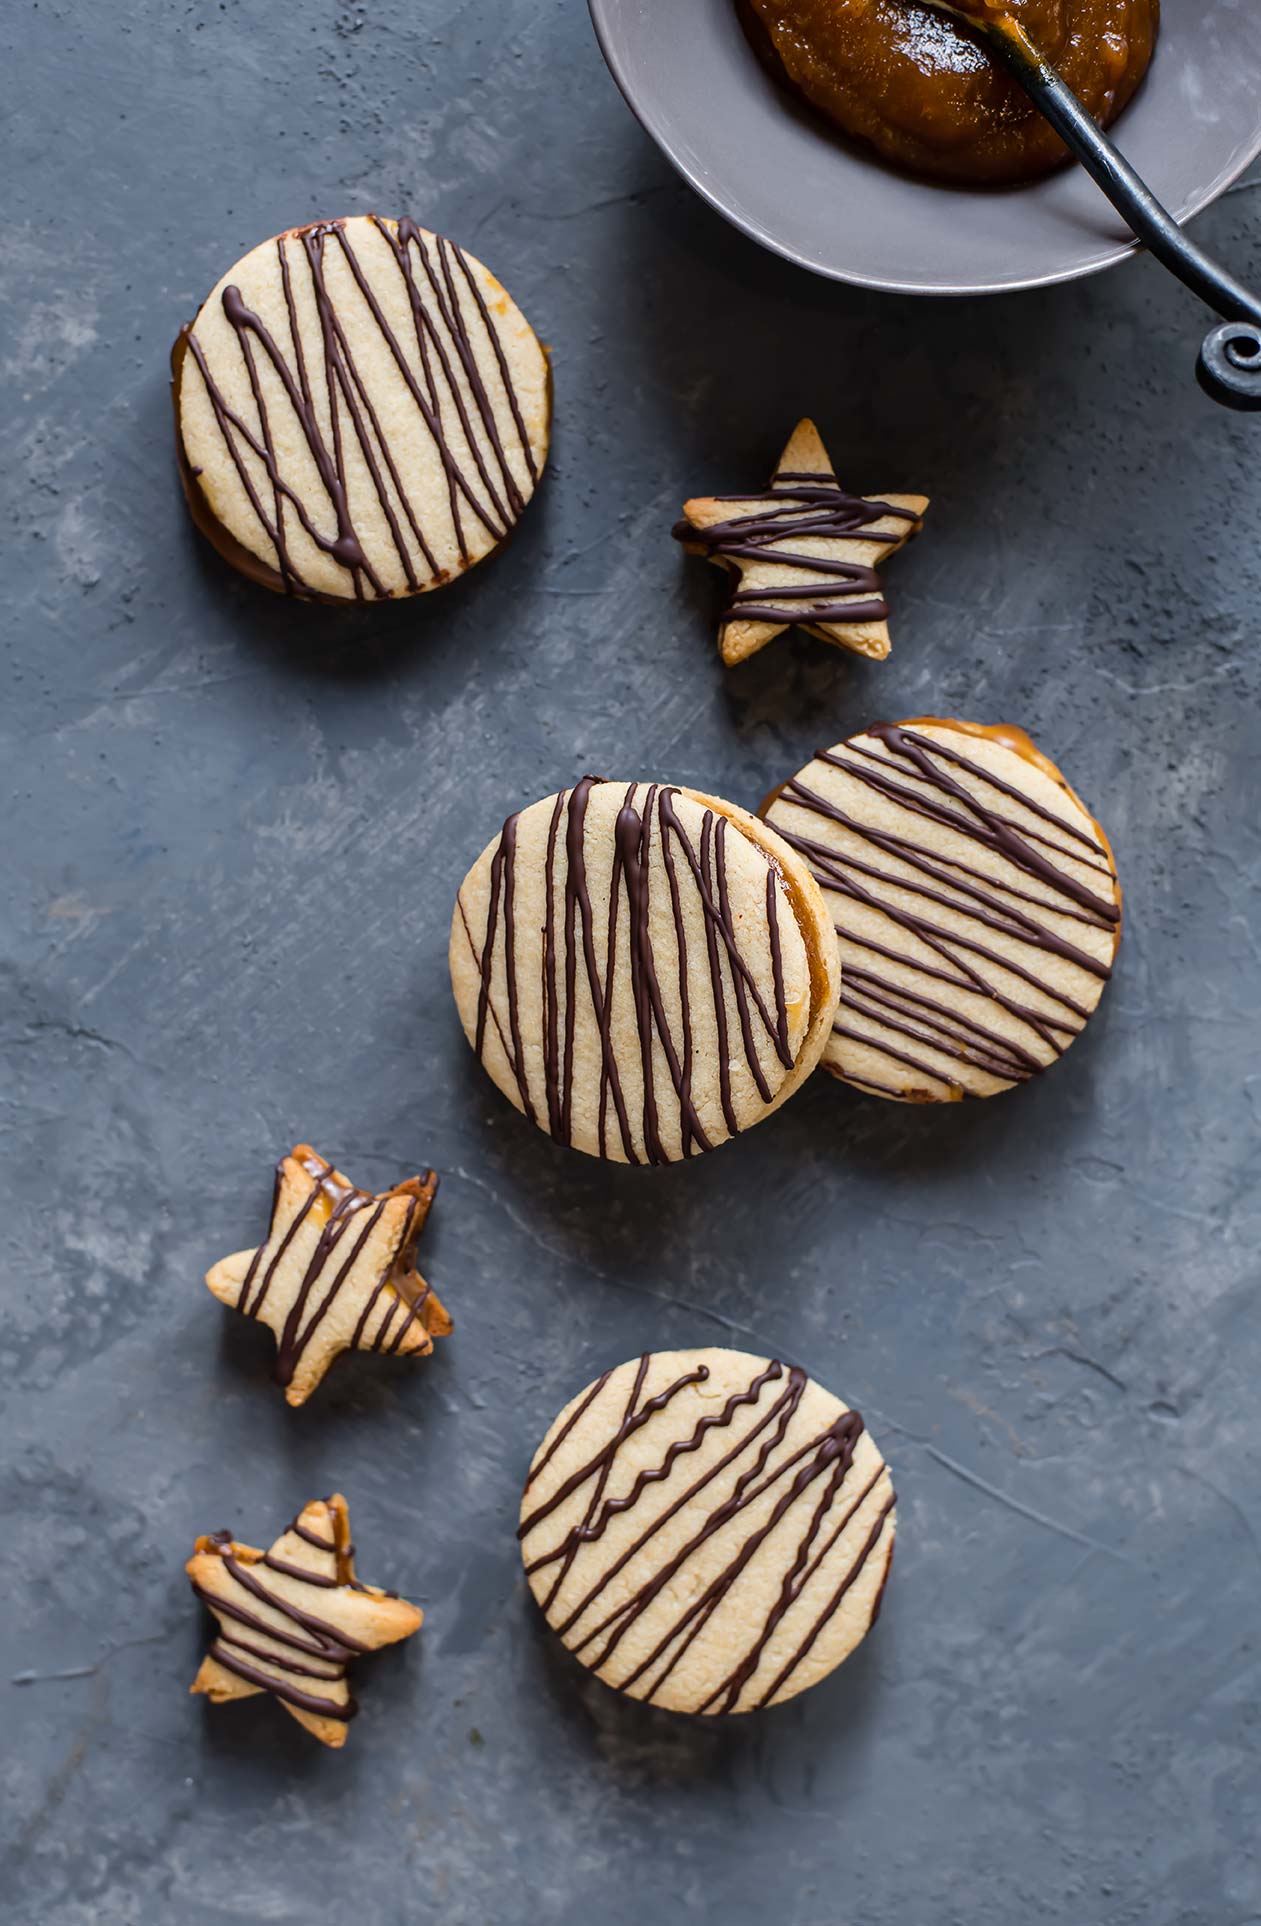
    • Simplified. (Can I get a hoorah?) The original asked for both almond flour and coconut flour, but since 2015 I’ve discovered a much simpler grain-free shortbread cookie using just almond flour. I quite like the texture of the cookies, too! They are a bit chewy, stay together well, and have great almond and honey flavor.

    • Drizzled with chocolate. How can you make a boring cookie look a little fancier? Maybe you’re thinking frosting, which is true, but since this cookie is a sandwich I wanted the filling to shine. I drizzled each cookie with chocolate, which was just the right touch!

    • Doubled it. More is better right? In this case, there’s no doubt: the original recipe made about 6 sandwich cookies… what was 2015-me thinking?!?! A dozen is much more reasonable (but you still may want to double that if you’re cooking for a crowd).

    Once baked, these cookies are stuffed with pumpkin butter, so the end result tastes a bit like pumpkin pie. Perfect match with a cappuccino! But I also experimented with filling the cookies with salted caramel. Oh. My. Goodness. Now that’s a treat! A bit like an alfajore, if you are familiar. I am definitely going to need to make an alfajore recipe now (Foraged Dish style, of course!).

    Grain-free sandwich cookies with pumpkin butter
    Grain-free sandwich cookies with pumpkin butter

    Grain-Free Sandwich Cookies with Pumpkin Butter

    Published October 26, 2015 by
       Print This Recipe

    Yield: 12-24, depending on size   |    Active Time: 60 minutes


    Ingredients:

  • 2 cups finely ground almond flour
  • 1/4 teaspoon baking soda
  • 1/4 cup butter or coconut oil, melted
  • 1/4 cup honey
  • 1 teaspoon vanilla extract
  • 1/2 cup pumpkin butter
  • 1/4 cup dark chocolate

  • Directions:

    1. In a medium mixing bowl, combine the almond flour, salt, and baking soda. Whisk until incorporated. Add the melted butter or coconut oil, honey, and vanilla, and stir until a dough forms. Shape dough into a disc (about 1 inch thick), wrap in plastic wrap, and place in fridge for 30 minutes to 1 hour to chill.
    2. Preheat oven to 325°F. After dough has chilled, remove from fridge. Cut a piece of parchment paper to fit your baking pan.
    3. On a separate piece of parchment, use a rolling pin to roll dough out to 1/4-inch thickness. Use cookie cutters to cut circles out of dough and place on baking sheet, with at least 1/2 inch between each cookie. Bake for 9 minutes, until golden. Allow to cool.
    4. Once cookies are fully cooled, spread pumpkin butter on one cookie, and then use another to create a sandwich. Set aside, and then continue until all of the cookies are sandwiched.
    5. Heat the chocolate in a microwave-safe bowl for 30-second intervals (string between each!) until chocolate is glossy and smooth. You can also do this in a double boiler (stir frequently). Drizzle melted chocolate over sandwich cookies. Allow chocolate to set before serving cookies.
    6. Tip: You can use any sort of jam to fill these cookies! I also made a few with salted caramel sauce and they were SO. GOOD.

    4 Comments