Creamy Chana Masala

Creamy Chana Masala

Longtime readers of this blog are familiar with my stories from Northern India, a trip I made when I was sixteen (you can read about how the trip inspired my Indian Carrot Pudding recipe, or this Slow Cooker Kashmiri Braised Lamb). This year (2018) is exactly a decade after that trip, but moments from that adventure are stamped vividly forever in my memory: stepping in cow dung on the overwhelming and noisy streets of New Delhi; playing on the shores of the Chandrabhaga River, snapping pictures of the rocks and sand as if there was something special about sand in India versus Colorado; eating dinner on the rooftop of a hotel in Udaipur on New Years Eve, lights glimmering against the river below; knocking on a small door in an alleyway, with a little sign next to it that said “cooking school;” and many more.

There is something about our brains at sixteen years old: they are pliable, receptive, and ready to learn. They are forming and reforming and reinforcing with every visual we take in. I was the perfect age for that trip. Open, ready, receiving. And my mind did just that. It formed connections that would never be broken, a passion for an older world, where roads are made of laid stone and brightly colored buildings are crammed together. A craving for chapati and mounds of spices and Chana Masala.

Creamy Chana Masala
Creamy Chana Masala

When we passed through that small door in the alley, a short woman ushered us into her home. She got out paper and a pen, and asked what we would like to learn to cook. She made notes, and suggestions, and then told us when to come back for our lesson. 

Boldly I remember the simplicity of her kitchen. People talk about having a “minimalist kitchen” these days, but this was on a whole different level. The walls, the floor, the shelves, the cooking surface (the counter, if it could be called that), were all made of the same grey-ish stone material, solid and a bit bleak. A window behind us, with no glass pane, looked down on the street. There just enough room for the four of us: the teacher, my dad, myself, and our teacher's little daughter who must’ve been no more than three or four years old. She sat perched on the cooking surface in the corner, making flat bread.

Chana Masala is one of the dishes we learned to make that day. It's simple, if you know what to do.

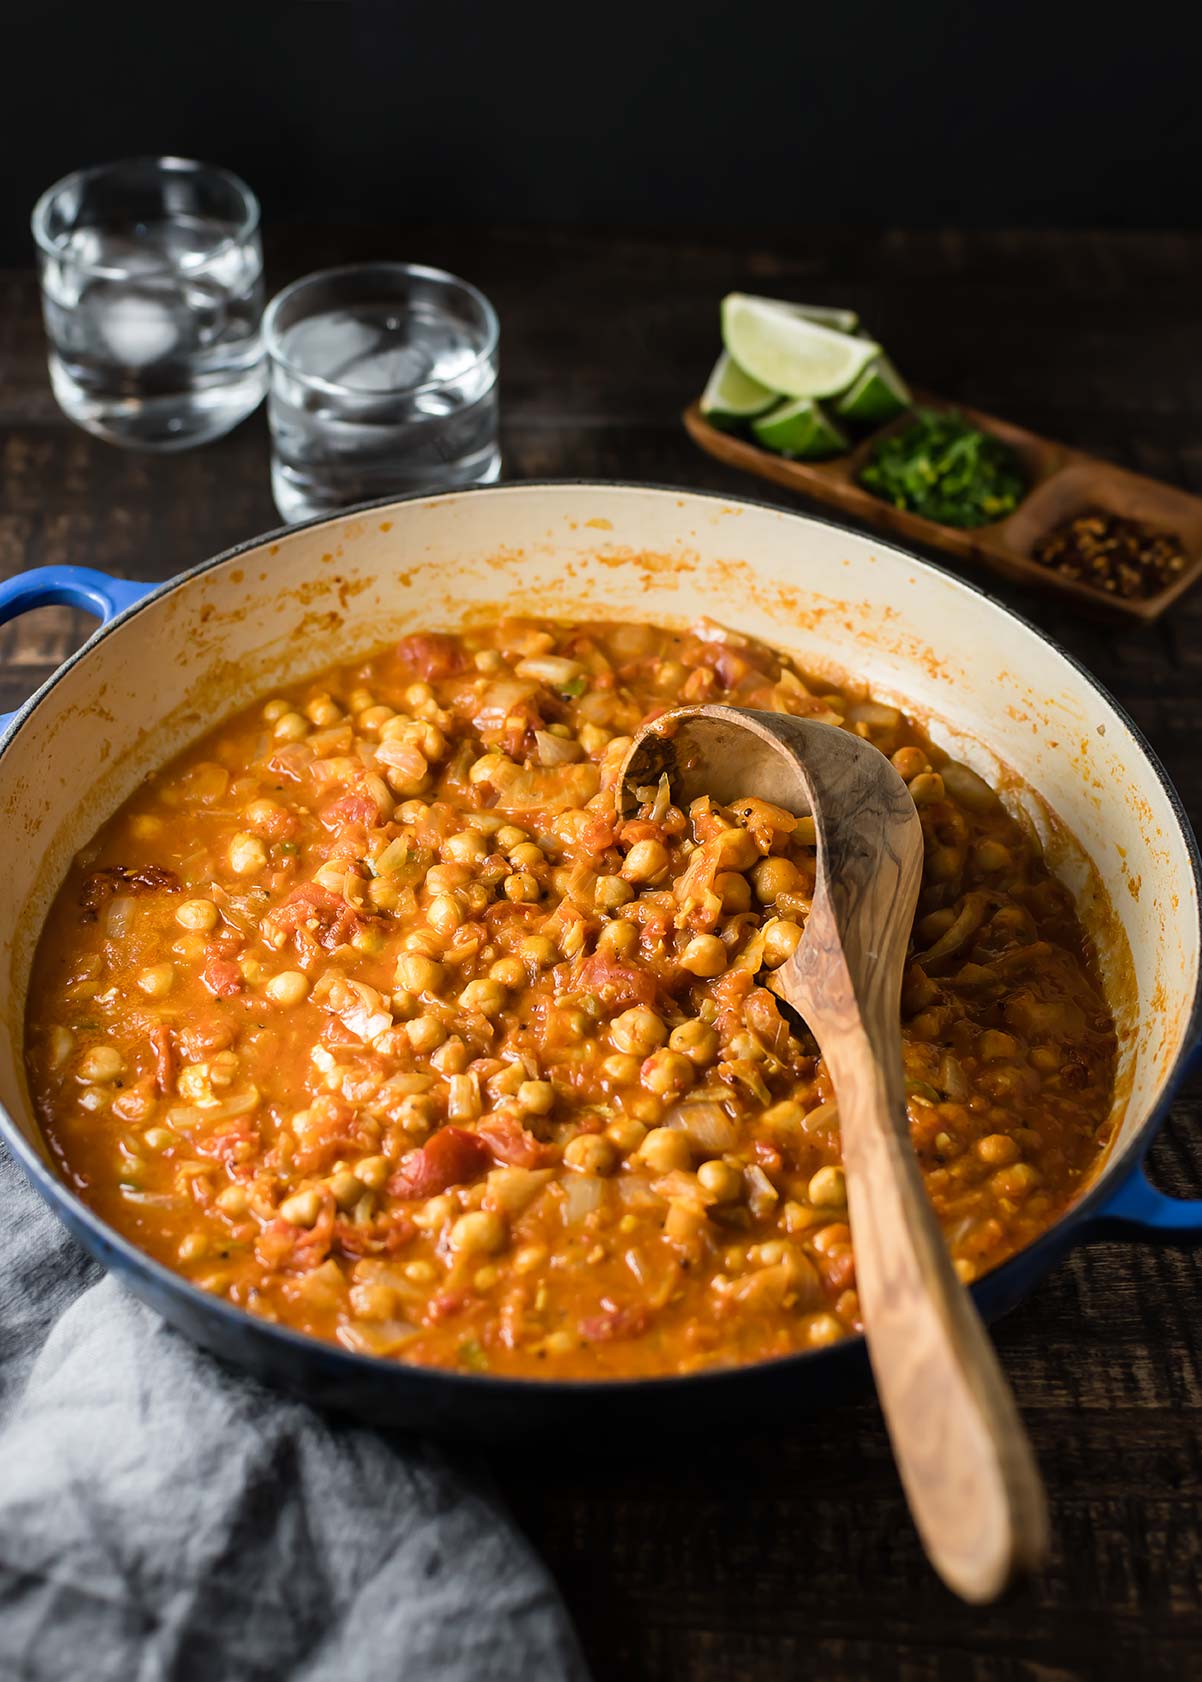
This recipe is a bit different from the one we learned to make in India. For one, the grocery stores here in the United States have nothing on the markets of India when it comes to finding curry blends. But also, I've added coconut milk to the mix, which makes it nice and creamy. Coconut and curry go together so well, I highly recommend giving it a spin. 

Either way, Chana Masala (which means “Spiced Chickpeas” in Hindi) is a one-pot wonder, and packs a boat load of flavor in. If you can make a stir fry, you can make Chana Masala! It’s also completely plant-based, so if that’s your thing, turn on the burner now!

Creamy Chana Masala

Creamy Chana Masala

Published May 3, 2018 by

Serves: 4   |    Total Time: 30 minutes


Ingredients:

  • 2 tablespoon coconut oil or ghee
  • 2 onions, diced
  • 7 garlic cloves, minced
  • 1 inch ginger, minced
  • 1 serrano chili, minced
  • 1 14-ounce can crushed tomatoes
  • 1/2 cup water
  • 1/2 teaspoon ground cumin
  • 1/2 teaspoon salt
  • 1 teaspoon ground curry powder
  • 1/4 teaspoon ground coriander
  • 2 14-ounce cans chickpeas, drained
  • 1 cup full-fat canned coconut milk
  • 1 teaspoon lime juice
  • Fresh cilantro for serving

Directions:

  1. Heat oil over medium heat in a large skillet until it glistens. Add diced onion, garlic, and ginger to the pan, and sauté until onion is transparent. Add minced serrano chili, crushed tomatoes and water, and bring to a simmer.
  2. Add cumin, salt, curry powder, coriander, and water to the pan, and stir. Then, add the chickpeas and coconut milk. Place lid on pan and simmer for 5 minutes, stirring once or twice, until chickpeas are warmed through and coconut milk is melted in.
  3. Finish by stirring in the lime juice and topping with cilantro. Serve hot over rice, cauliflower rice, etc.

One Pan Paleo Chicken Cacciatore

Camera Update: I got my new camera in mail yesterday! I’m over the moon. I’ll be returning to the regular posting scheduling shortly, now what I can shoot! 

Now... on to this delicious dish! 

I’ve been on a re-working streak: revisiting old favorites from the blog and taking new pictures (like this Chicken & Sweet Potato Curry, or this Lemony Garden Vegetable & Chicken Soup). It takes some of the mind-work out of the equation, leaving me to only do the creative pieces: photography, a bit of writing, quite a lot of eating. 

This one-pan chicken cacciatore is one of those revisited recipes. I originally made this recipe when I was in the middle of finals for grad school. It feels like a lifetime ago. At the time, exams, essays, and textbooks took up such a large part of my life it was hard to believe it could be any other way. In retrospect that was a short lived moment in my journey, one that I even forget about most of the time. All the better, as my experience with grad school was unremarkable. 

One Pan Paleo Chicken Cacciatore

When I first published this recipe I had said, "I need meals that are simple, quick, and take a minimal amount of brain work.” But I was also looking for ways to express myself creatively, something multiple choice tests didn’t allow. It's that creative need that comes through in this recipe, inspired by a single night out at Pasta Jay’s on Pearl Street. 

I remember—not the exact dish I had eaten at Pasta Jay’s- but the thoughts that ran through my head when I ate the leftovers out of a cardboard to-go box the next day. The dish awed me, to be honest. I had never had anything but pasta-laden dishes from Italian restaurants before (to be expected), but this dish had no pasta, and was the best thing I’d eaten that month. 

Making cacciatore is a bit of a production: if you really want to impress people, you’ll need to get fresh basil, and there are a few things you’ll need to chop. Oh, but it’s worth it. Since I’m usually making this on a weeknight, after running errands or getting a workout in, I try to chop everything ahead of time (in the morning, or the night before). I’ll even measure out the spices and put them in a bowl, so that when evening rolls around I don’t even have to think. Just put things in the pot (I use a blue Le Creuset Braiser for meals like this) and remember to stir occasionally! 

One Pan Paleo Chicken Cacciatore

One Pan Paleo Chicken Cacciatore

Published February 27, 2018 by

Serves: 4   |    Total Time: 60 minutes


Ingredients:

  • 1 pound bone-in chicken thighs (boneless and skinless is fine too, just reduce cooking time - cook thighs until internal temperature reaches 185°F)
  • 1 teaspoon coconut oil
  • 1/2 medium white onion, sliced
  • 3 cloves garlic, minced
  • 2 bell peppers, sliced in strips (choose a variety of colors: yellow, red, or green)
  • 1/4 cup red wine, such a Pinot Noir or Sirah
  • 2 14.5-ounce cans of crushed tomatoes
  • 1/2 cup canned artichoke hearts, drained and quartered 
  • 1 teaspoon balsamic vinegar
  • 1/4 cup fresh basil leaves, sliced chiffonade style style, plus more for garnish
  • 1/2 teaspoon red pepper flakes 
  • 1/2 teaspoon dried oregano 
  • 1/2 teaspoon dried thyme 
  • 1/4 teaspoon salt
  • 1/4 teaspoon ground black pepper
  • Optional for serving: grated Parmesan Reggiano cheese, red pepper flakes, extra basil leaves

Directions:

  1. Heat the coconut oil over medium-high heat in a large skillet (I use my 5-qt Le Creuset Braiser, though a 13 to 15 inch skillet would work as well). Once the oil glistens, place chicken thighs skin-side down in the pan. Sear the chicken for 3 minutes, then flip them over and continue to cook chicken for 5 more minutes.
  2. After 5 minutes, place the onions, garlic, and peppers in pan. Cook, stirring occasionally, until the onions are translucent. Add the wine, and scrape the pan with a wooden spoon. Bring to a simmer.
  3. Pour in the tomatoes, and stir in the artichoke hearts, balsamic vinegar, basil, thyme, red pepper flakes, oregano, salt and pepper.
  4. Bring back up to simmer, and place lid on pan. Cook, for 20-30 more minutes, until an instant read thermometer reads 185°F when inserted into the center of the thickest thigh.
  5. Remove from heat, and serve on plates or in bowls. Garnish with grated parmesan, red pepper flakes, and/or extra basil.
  6. Tip: try serving this over spiralized zucchini or spaghetti squash for a grain-free pasta option.

Denver Omelet Breakfast Casserole

Denver Omelet Breakfast Bake

As a Colorado girl, you think I’d know how to make a Denver omelet. But that’s not the case. I found myself one morning Googling "Denver omelet."

It turns out a Denver omelet calls for peppers, onions, ham, and sharp cheddar cheese. Reading this, I scrunched my nose. Ham in sandwiches, sure. But ham in an omelet? I was not convinced. But, I was determined to make a Denver omelet. Or at least something like it, because what I really wanted to make was a breakfast casserole that we could keep in the fridge all week and eat each morning. (I’ve become lazy with cooking in the morning lately, so having something already made is key to eating a good breakfast). The only other requirements? Hash browns. Because hash browns are awesome (I know I don't need need to tell you that).

I took a few notes, and headed to the store with a vague idea of a casserole in my mind. 

Denver Omelet Breakfast Bake

Walking through the butcher section, I perused various types of ham, but just couldn’t bring myself to do it. I opted for chorizo instead. You can do either--it’s really whatever suits your fancy. Either way, you’ll end up with a hearty vibrant casserole inspired by the Denver omelet. 

This make-ahead-breakfast was such a winner in our house that it is sure to become a regular. And the best part? Well, I think it was the hash brown base! Not usually part of a Denver omelet, but worth adding in. 

So, if you’re trying to feed breakfast to a crowd this week, or just trying to get ahead of your own schedule, this casserole is your answer! 

Denver Omelet Breakfast Bake

Denver Omelet Breakfast Casserole

Published December 26, 2017 by

Serves: 4-6   |    Total Time: 45 minutes


Ingredients:

  • 1 tablespoon coconut oil or butter, plus more for greasing pan
  • 2 cups thawed frozen hash browns or shredded potatoes 
  • 1/2 yellow onion, diced
  • 1/2 cup red bell pepper, diced
  • 1/2 cup green bell pepper, diced
  • 1 link or 1/4 cup diced chorizo sausage, sliced into 1/2-inch pieces (traditional would be cured ham, but I prefer chorizo)
  • 6 eggs
  • 1/4 cup milk of choice 
  • 1/4 teaspoon salt, divided 
  • 1/4 teaspoon black pepper, divided
  • 1/2 cup shredded sharp cheddar cheese
  • Cilantro for garnish

Directions:

  1. Preheat oven to 375°F, and generously grease a 9x16 inch baking dish.
  2. Place thawed shredded potatoes in the pan, and gently press into an even layer on the bottom. Season with half of the salt & pepper. Set aside.
  3. Heat coconut oil in a skillet over medium heat on the stove. Add sausage pieces, and cook until browned. Use a spatula to transfer sausage to the baking dish, spreading in an even layer over the potato layer.
  4. Now, sauté the onion and bell peppers in the skillet, adding additional coconut oil if the skillet is dry. Sauté until the onions are transparent. Then, transfer onion and pepper mixture to the baking dish, spread in an even layer and mixing with the sausage.
  5. In a medium mixing bowl, combine the eggs, milk, and remaining salt & pepper. Whisk until frothy, and then pour egg mixture into casserole pan. Bits of bell pepper and sausage should still be visible, but the egg mixture should be evenly distributed through the pan.
  6. Place pan in oven and bake for 20 minutes. At the 20 minute mark, pull the casserole from the oven, top with cheese in an even layer, and bake for 5-10 more minutes, until cheese is bubbling and the casserole is cooked through.
  7. Allow to cool 5 minutes, and then top with cilantro for garnish. Serve hot. (Hot sauce is great on this casserole, if you like hot sauce on your eggs!)

Denver Omelet Breakfast Bake