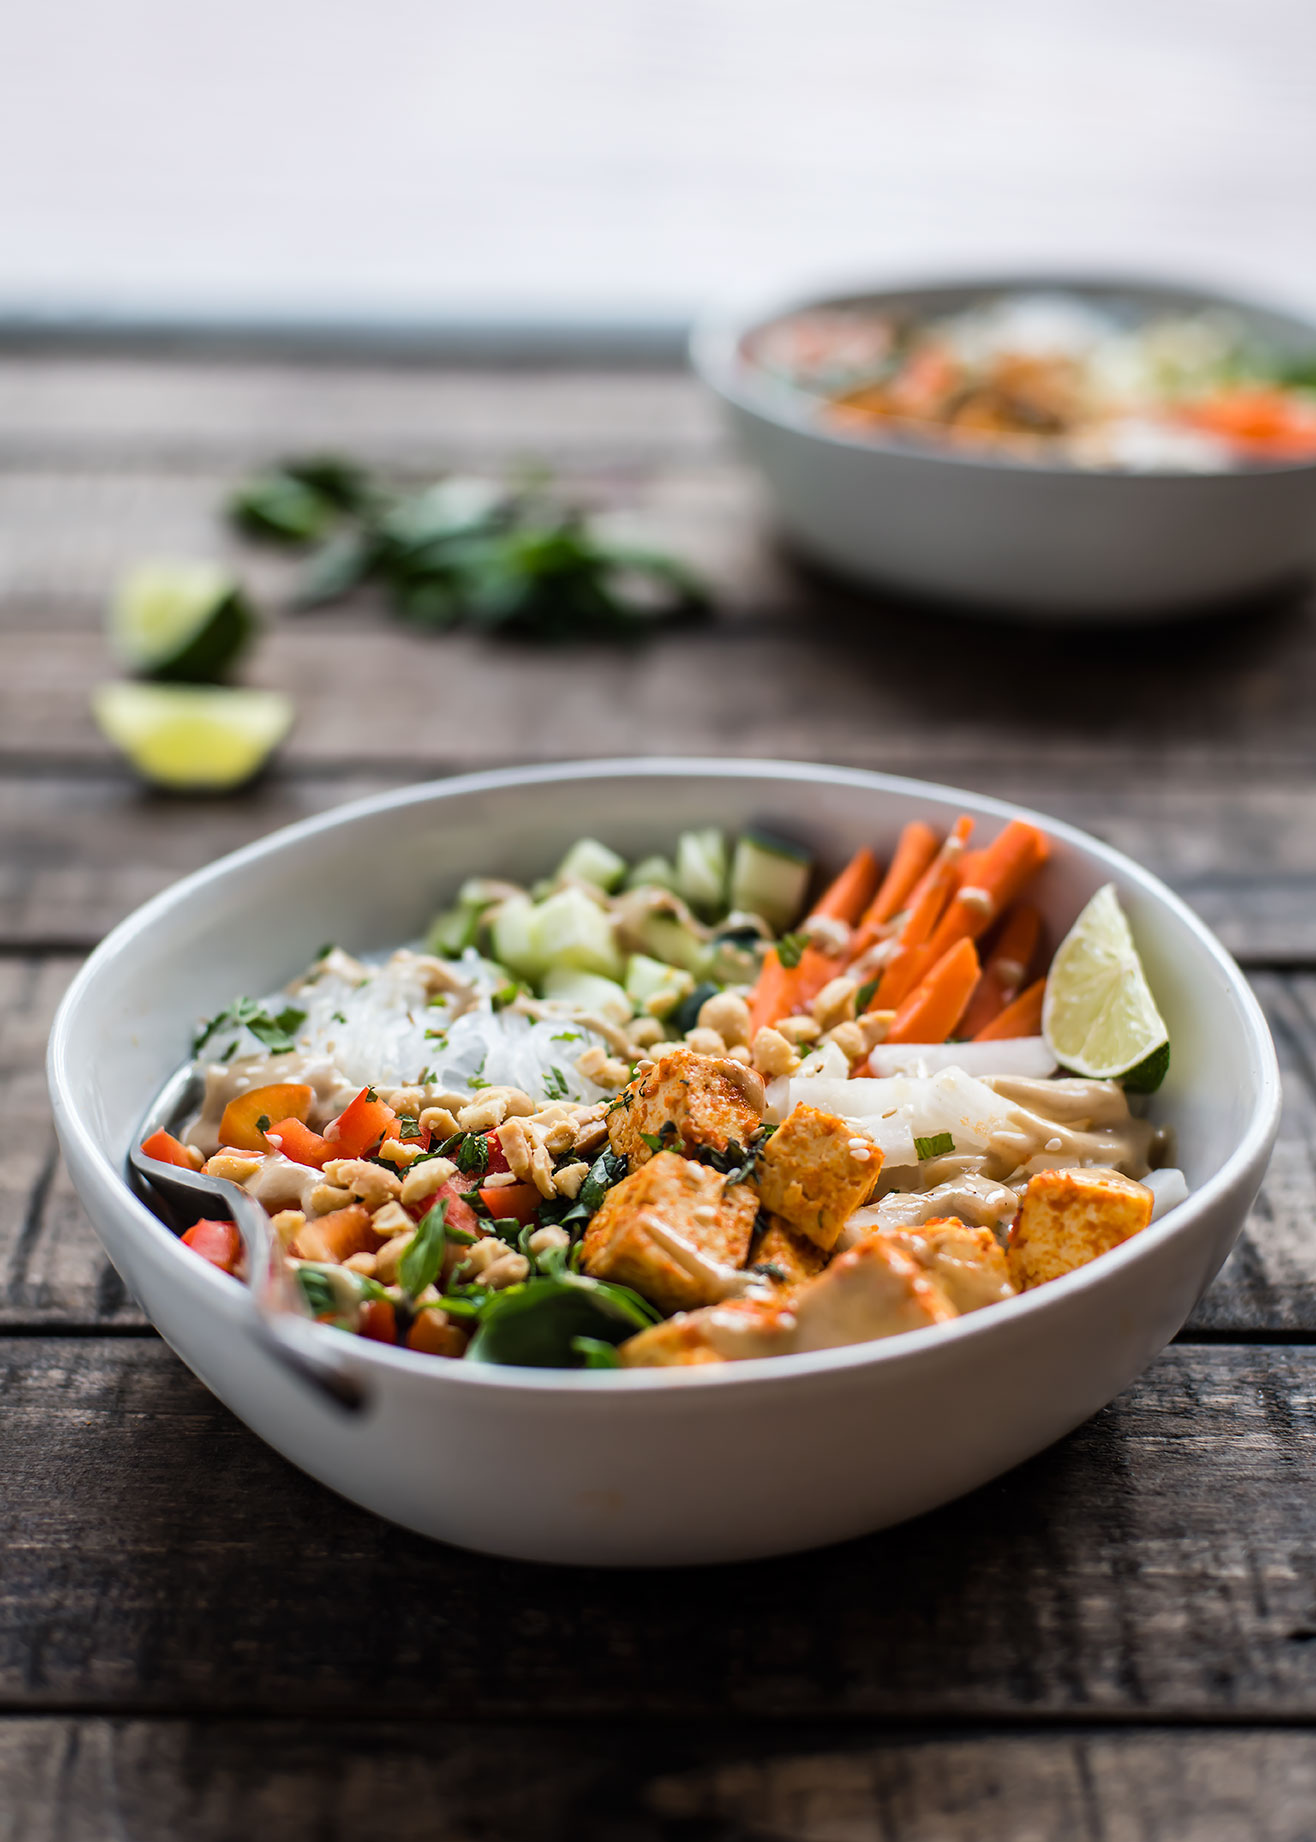
Cold Rice Noodle Bowls with Sriracha Tofu, Thai Basil & Tahini Sauce

Cold Rice Noodle Bowls with Sriracha Tofu, Thai Basil & Tahini Sauce

I’m trying something a little different today: a consolidated blog post. While I love writing, sometimes getting a blog post drafted (and published) is a chore. And, I have heard so many people—from friends to general internet chatter—say they wish it was easier to get to the damn recipe! So, here you are. This is an ingredient-heavy recipe, but once you’ve made it once you’ll see it’s quite easy to throw together. Cold rice noodles make a great lunch for enjoying in the sun, on the patio. Fresh herbs, tahini, and spicy Sriracha are bold and bright. Hope you enjoy!

Cold Rice Noodle Bowls with Sriracha Tofu, Thai Basil & Tahini Sauce

Cold Rice Noodle Bowls with Sriracha Tofu, Thai Basil & Tahini Sauce

Published May 7, 2019 by

Serves: 4   |    Active Time: 30 minutes


Ingredients:

For the Sriracha tofu:
  • 1 pound extra firm or super firm tofu, drained
  • 2 tablespoons Sriracha
  • 1 tablespoon olive oil
  • 1 teaspoon soy sauce

  • For the tahini dressing:
  • ½ cup tahini
  • 2 tablespoons maple syrup
  • 2 tablespoons soy sauce
  • 2 tablespoons rice vinegar
  • ¼ cup water
  • 1 tablespoon finely grated fresh ginger
  • 1 teaspoon minced garlic

  • For the bowls:
  • 1 eight ounce package Mai Fun rice noodles
  • About 2 cups spring greens
  • 1 red bell pepper, diced small
  • 1 cucumber, diced small
  • 1 large carrot, julienned
  • 1 daikon radish, julienned
  • 3 sprigs Thai basil
  • 3 tablespoons fresh mint leaves, minced
  • 3 tablespoons roasted peanuts, roughly chopped
  • Optional garnish: toasted sesame seeds and lime wedges

  • Directions:

    1. Preheat oven to 475°F and fit a baking sheet with parchment paper.
    2. Place Sriracha, olive oil, and soy sauce in a medium mixing bowl and whisk to combine. Cut tofu into 1-inch cubes and place in bowl. Use a spatula to gently turn tofu in sauce until coated. Using tongs or a fork, move tofu to prepared baking pan, leaving at least 1/2 inch of space between pieces. Bake for 10-12 minutes. Using tongs, flip tofu to the other side. Bake for an additional 12-15 minutes, then place pan aside to cool and turn off oven.
    3. Meanwhile, prepare tahini dressing: place tahini, maple syrup, rice vinegar, water, ginger, and garlic in a small bowl and whisk until fully incorporated (note: at first, tahini might not want to mix in, but eventually it will become a smooth sauce!).
    4. Cook rice noodles according to package. Place cooked rice noodles in a fine mesh sieve and rinse with cold water.
    5. Assemble bowls: divide spring greens among serving dishes. Top with rice noodles. Add red pepper, cucumber, carrot, and radish. Top with tofu, then garnish with basil, mint, peanuts, sesame seeds, and lime wedges. Drizzle with tahini sauce. Serve.

    Cold Rice Noodle Bowls with Sriracha Tofu, Thai Basil & Tahini Sauce

    No-Churn Rhubarb Crisp Ice Cream

    No-Churn Rhubarb Crisp Ice Cream

    About a ten months ago this recipe for no-churn chocolate ice cream landed on my screen. Was it possible? A no-churn ice cream that was worth an almost perfect rating? Even after making it, I was boggled by how darn good (and easy to make) it was. That moment was a game changer, because I realized how easy it would be to adapt that chocolate ice cream recipe into any flavor I could dream of.

    First I folded chunks of grain-free peanut butter cookie into the chocolate base. (That was amazing, highly recommended for PB lovers). Then, I skipped the cocoa and folded in instant coffee powder, along cacao nibs and extra caramel sauce I had in the fridge (from this recipe). Also a hit — best afternoon pick me up. 😍

    Next, I made pistachio paste and mixed that in. This recipe was proving itself to be extraordinarily adaptable. But there was one thing I couldn’t get out of my head: rhubarb crisp ice cream. I have a thing for ice creams named after baked goods — or at least, the few ice creams I’ve had that fit this bill have been amazing. One was Ben & Jerry’s Pecan Pie Ice Cream, which they later discontinued (though I found out in the process of writing this post that they now have a similar flavor as a regional special). The second was oatmeal cookie ice cream from Lucky’s Bakehouse & Creamery in Boulder — wonderful with fresh peaches!

    Anyways — the best part of this ice cream, to me, is when the sweet vanilla cream swirls with the crispy, butter oat topping. 🤤

    No-Churn Rhubarb Crisp Ice Cream

    No-Churn Rhubarb Crisp Ice Cream

    Published April 9, 2019 by

    Serves: 12   |    Active Time: 20 active minutes; 5 hours in freezer


    Ingredients:

  • 1 14-ounce can sweetened condensed milk
  • 2 cups heavy cream, cold
  • Pinch salt
  • 1 teaspoon vanilla extract
  • About 1 cup of leftover rhubarb crisp, full cooled! — if crisp is at all warm, it will melt the ice cream into a slop. Tip: the oaty crisp is the best part! Make sure you have some of that in there.

  • Directions:

    1. Whisk together the sweetened condensed milk, salt, and vanilla in a small bowl. Set aside.
    2. In a separate large mixing bowl, whip heavy cream until peaks form (about 2 minutes on medium-high speed with a hand mixer).
    3. Fold 1 cup of the whipping cream into the condensed milk with a rubber spatula, then fold condensed milk mixture into whipped cream, folding gently so as to keep as much air in the whipped cream as possible. Fold until fully incorporated and few to no streaks of condensed milk remain (avoid over mixing).
    4. Pour mixture into a a 9x9 glass dish with a lid (a bread pan, or large pyrex Tupperware will work too). Cover and freeze for about 2 hours.
    5. Meanwhile, cut or crumble rhubarb crisp into small pieces. Rhubarb chunks should be bite-sized or smaller (aim for 1/2 inch pieces or smaller). Sprinkle rhubarb crisp over ice cream mixture, and then use a rubber spatula to gently swirl into the ice cream. Smooth ice cream in container, and then return to freezer for 3 more hours before serving.
    6. Store in an air-tight container in the freezer.

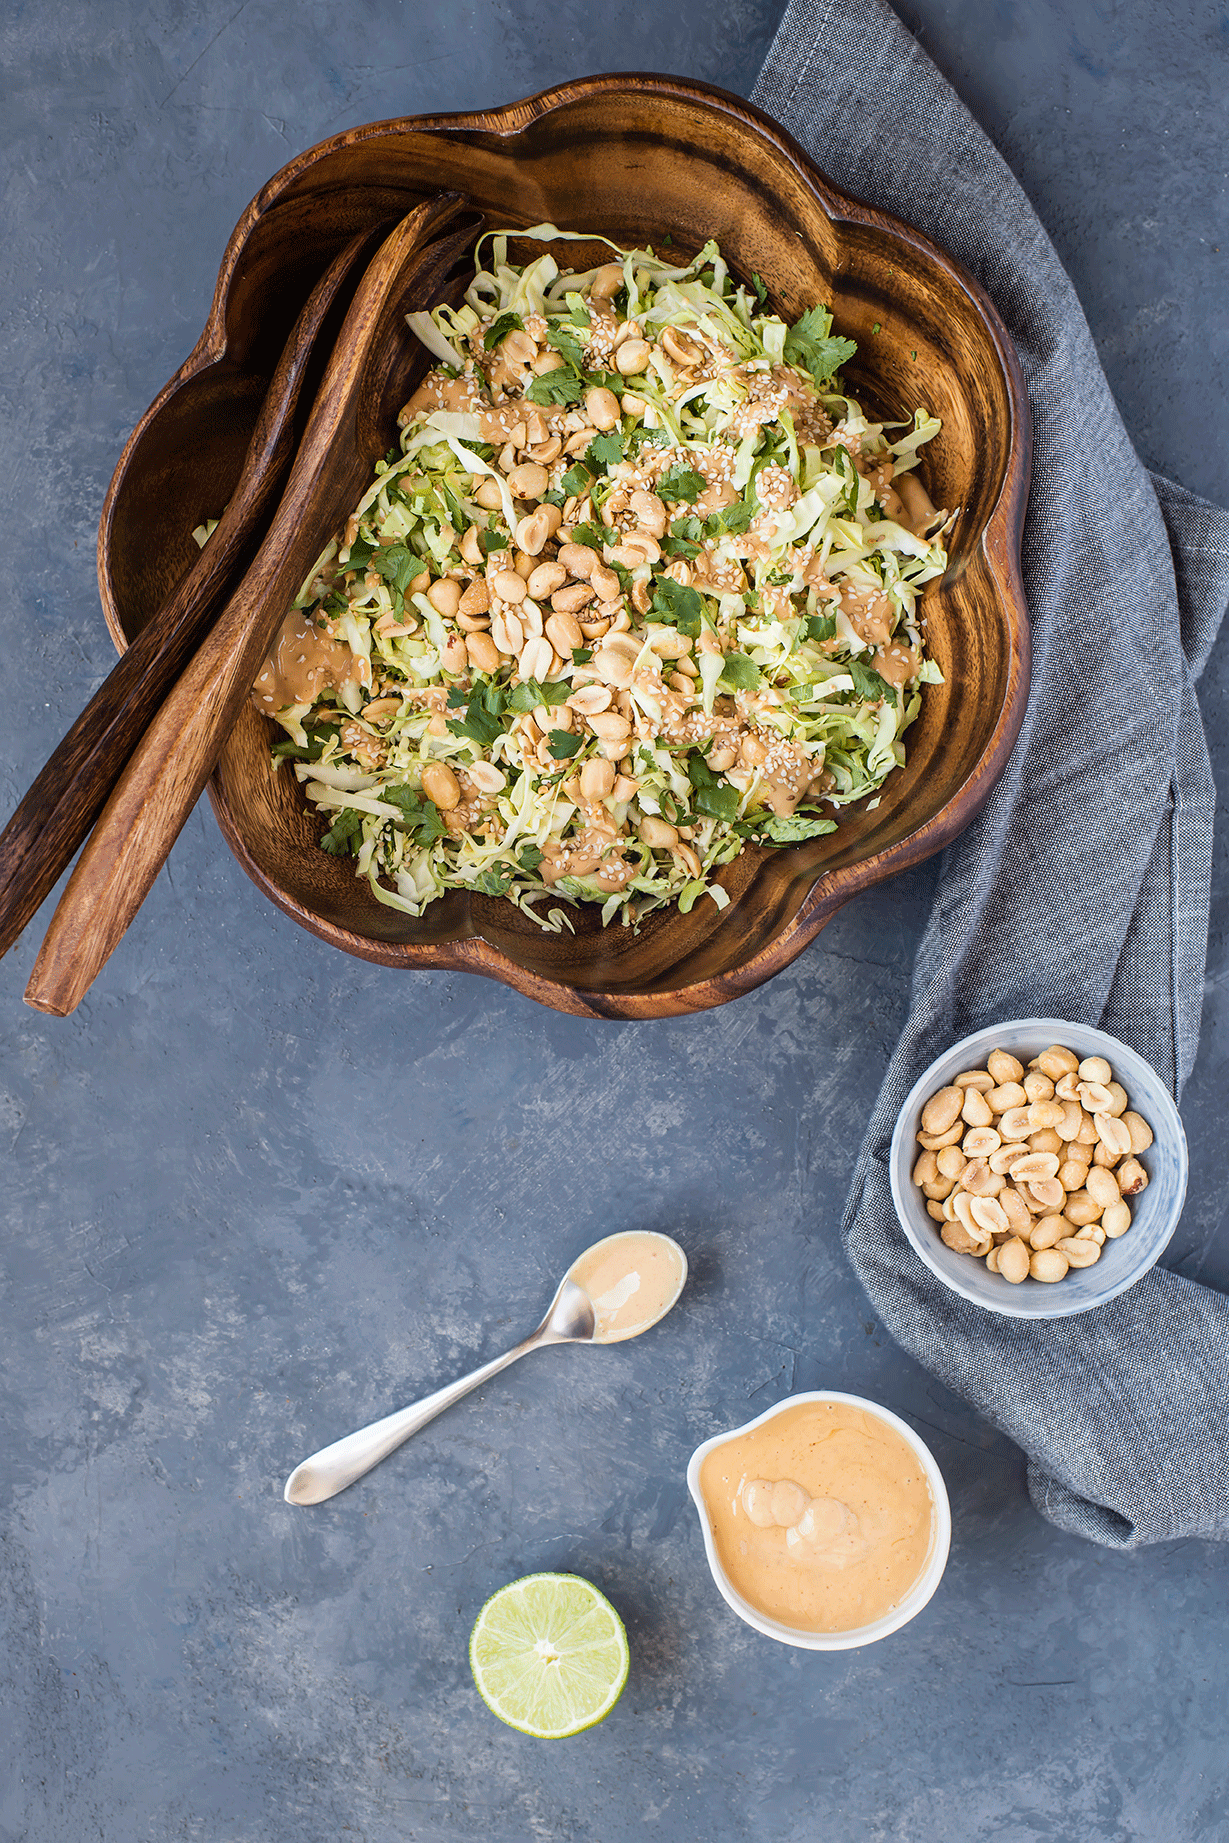
    Crunchy Cabbage & Peanut Slaw

    Crunchy Cabbage & Peanut Slaw

    As readers of my monthly newsletter know, I was that girl that brought a salad to a Super Bowl watching party. Yes. (But also, someone should be that person. The salad is always gone at the end of the night--or halfway through the night - and everyone is always glad to at least have a little freshness on their plates between tasting different dips and chips). 

    Where this crunchy cabbage peanut slaw began: I am a pack-my-own lunch kinda gal, but some days getting out of the office just to walk around is really the best medicine. It was a day like that when I wandered to Natural Grocers (a few blocks away), and picked up a prepared salad -- I was craving fresh veggies. The gulp of fresh air was nice, but the salad was dry and pretty boring. It was the idea of the salad that inspired me though: a simple cabbage slaw with a peanut dressing. 

    Crunchy Cabbage & Peanut Slaw
    Crunchy Cabbage & Peanut Slaw

    So I went home and dreamed up a better version, which is still a simple salad but it calls for a LOT of zesty peanut dressing -- a dressing far zestier and more addicting than the original. (So addicting in fact, that it also makes a very good dip for crudités).

    You'll notice right away that this dressing calls for a semi-long list of ingredients. They are (almost) all shelf-stable pantry staples, and despite the list of ingredients the magic of this sauce is in how it's made: plop everything in the blender and go. That's it. This is where I tell you: do not fear that list of ingredients, embrace it. It is worth it. And by the time you've checked to see if you have everything you need, you're only 30 seconds away from finishing the dressing. 

    Crunchy Cabbage & Peanut Slaw

    Crunchy Cabbage & Peanut Slaw

    Published February 19, 2019 by

    Serves: 4   |    Active Time: 20 minutes


    Ingredients:


    For the peanut dressing (yields about 1 cup):
  • 1/4 cup creamy peanut butter
  • 2 tablespoons olive oil
  • 2 tablespoons toasted sesame oil
  • 2 tablespoons seasoned rice vinegar
  • 2 tablespoons lime juice
  • 2 tablespoons maple syrup
  • 1 tablespoon soy sauce
  • 2 cloves garlic
  • 1 teaspoon minced ginger
  • 1 teaspoon salt
  • 1 teaspoon red pepper flakes
  • 2 tablespoons water to thin dressing, as needed

  • For the slaw:
  • 3-4 cups finely shredded green cabbage
  • 4-5 green onions, white and dark green parts removed
  • 1/4 cup minced cilantro
  • 2 tablespoons toasted sesame seeds
  • 1/2 cup roasted salted peanuts, roughly chopped
  • Optional additional add-ins we also love: 1 cup chopped bok choy, 1/2 cup chopped sugar snap peas, 1/4 cup minced Thai basil

  • Directions:

    1. Place all ingredients for the dressing, aside from the water, in a blender and purée until smooth. Then, add water as needed to thin dressing as needed (based on preferences).
    2. Sliced green onions and add to a salad bowl with cabbage and cilantro. Toss to combine. Top with sesame seeds and peanuts.
    3. Drizzle with about 1/3 to 1/2 cup peanut sauce, or to taste.