Pistachio Shortbread with Dark Chocolate

Pistachio Shortbread with Dark Chocolate

This is what the perfect companion to a morning cup of coffee looks like. Flakey, buttery shortbread shaped into a stick for easy dipping. It would be a far cry to call these “wholesome” or “healthy” (especially with your morning coffee), unlike so many recipes on this blog. But they’re beautiful, delicious and just the festive treat I wanted this month. Happy baking season!

Pistachio Shortbread with Dark Chocolate

Pistachio Shortbread with Dark Chocolate

Published December 12, 2019 by
   Print This Recipe

Yields: 24   |    Active Time: 45 minutes


Ingredients:

  • 1 cup (2 standard sticks) unsalted butter, room temperature
  • 1/2 to 2/3 cup sugar, see note - depending on how sweet you want your cookies, plus extra for topping
  • 3/4 teaspoon vanilla extract
  • 2-1/3 cup all-purpose flour
  • 1/8 teaspoon salt
  • 1/4 cup unsalted, shelled pistachios, plus extra for topping
  • 1-2 tablespoons water
  • 4-6 ounces semi sweet chocolate chips or dark chocolate of choice

  • Directions:

    1. Beat together butter and sugar using and electric mixer (hand mixer or stand mixer will both work fine). When creamy, add vanilla and beat in.
    2. Sift together flour and salt. Add to butter mixture. Beat on low until a crumbly mixture forms. Continue to beat, adding 1 teaspoon of water at a time until a dough begins to come together. Dough will still be crumblely, but should stick together when pinched between two fingers.
    3. Roughly chop pistachios, and fold into batter.
    4. Shape dough into a disc, and wrap in plastic. Refrigerate for 30 minutes.
    5. Preheat oven to 350°F. Line baking sheet with parchment or a sil-pat.
    6. Roll cookie dough with a rolling pin to 1/4 to 1/2 inch thickness. Cut into 1x3 inch rectangles, and place cut cookies on baking sheet. Optionally, sprinkle with a few pinch of granulated sugar.
    7. Bake cookies for 20-25 minutes, until cookies just begin to turn golden. Place cookies on cooling rack.
    8. When cookies are completely cool, melt chocolate for dipping: place chocolate in a microwave-safe bowl. Heat in the microwave for 30-second intervals, stirring between every set to avoid burning. When chocolate is smooth, dip cookies: working one at a time, dip the cookies into the chocolate. Allow the access to run off, and then place on cooling rack. Optionally, sprinkle chocolate with finely chopped pistachios.
    9. Note: The amount of sugar in this recipe can be varied between 1/2 cup and 2/3 cups sugar. Use 1/2 cup if you prefer slightly less sweet desserts, of 2/3 cups for more traditionally sweet cookies.

    Comment

    Soft & Chewy Flourless Ginger Tahini Cookies

    Soft & Chewy Ginger Tahini Cookies

    In January, well after holiday season was over, a client sent a big box of Tate's Cookies to the office, where they filled the kitchen counter for half a week. It was the worst (but also the best) kind of way to kick off January. I had been wanted to make a gingery version of these tahini chocolate chip cookies for some time -- I even had made a batch over the holidays that didn't quite work out. Despite it being peak resolution season, that counter full of cookies was just the push I needed to dive back into recipe development. 

    The dream: a chewy, rich, flourless ginger cookie with chunks of crystallized ginger. 

    I knew that tahini would be the perfect base, but my first attempt used far too much molasses and the cookies were WAY too soft. I learned, on that attempt, that coconut sugar really imparts enough molasses-y flavor anyhow, as it's unrefined so still carries all of the minerals that are stripped from refined sugars when molasses is made. 

    Soft & Chewy Ginger Tahini Cookies
    Soft & Chewy Ginger Tahini Cookies

    Tips for making these chewy tahini ginger cookies: 

    • STIR THAT TAHINI. This is in all caps because it's no joke. Tahini separates fast and if your tahini is all oil or all solids you're batter won't work. Last time I published a tahini cookie recipe someone asked about how to best stir tahini, which is a really good question because it's not the easiest to stir. But don't worry! Just scrape the entire jar into a blender, and let it rip. OR, carefully put your immersion blender into your tahini container (this is what I do, but also can foresee what a mess this might make in the wrong circumstances) 

    • Let them cool. Really! I too like hot-out-of-the-oven cookies, but these cookies need a minute to set up. More like 5-10. They'll still be warm, and they'll stay soft for a week at room temperature. BUT, if you try to pick one up while it's still piping hot it will just collapse and melt in your hand (if you can even get it into your hand). 

    Ok, "mom" warnings over. Now, the recipe! 

    Soft & Chewy Ginger Tahini Cookies

    Soft & Chewy Flourless Ginger Tahini Cookies

    Published February 21, 2019 by
       Print This Recipe

    Yields: 16   |    Active Time: 30 minutes


    Ingredients:

  • 1 cup coconut sugar
  • 1/4 teaspoon baking soda
  • 1/4 teaspoon salt
  • 1/2 teaspoon ground ginger
  • 1/4 teaspoon ground cinnamon
  • 1/16 teaspoon ground cloves
  • 1 cup tahini (stirred very well - try blending it with your blender if it is separated)
  • 1 teaspoon vanilla
  • 1 egg
  • 1-1/2 teaspoon fresh ginger grated on a microplane
  • Optional: 1/3 cup ginger chips (like this - affiliate link) or finely chopped crystallized ginger

  • Directions:

    1. Preheat oven to 350°F.
    2. In a medium sized mixing bowl, combine coconut sugar, baking soda, salt, ground ginger, ground cinnamon, and ground cloves. Whisk briefly.
    3. Add tahini, vanilla, egg, and fresh ginger to bowl, and use a spatula to stir until a stiff, sticky batter forms.
    4. Optional: place bowl of batter in the fridge for 10 minutes to allow dough to stiffen a bit more.
    5. Using your hands, roll dough into spheres by the heaping tablespoonful. Place spheres at least 2 inches apart of a baking sheet lined with parchment paper, and flatted slightly with your fingers.
    6. Bake for 10-12 minutes, until cookies have spread and are golden. Cookies will still be quite soft when you remove them from the oven. Allow them to cool at least 10 minutes before attempting to move them to a cooling wrack or a plate.

    16 Comments

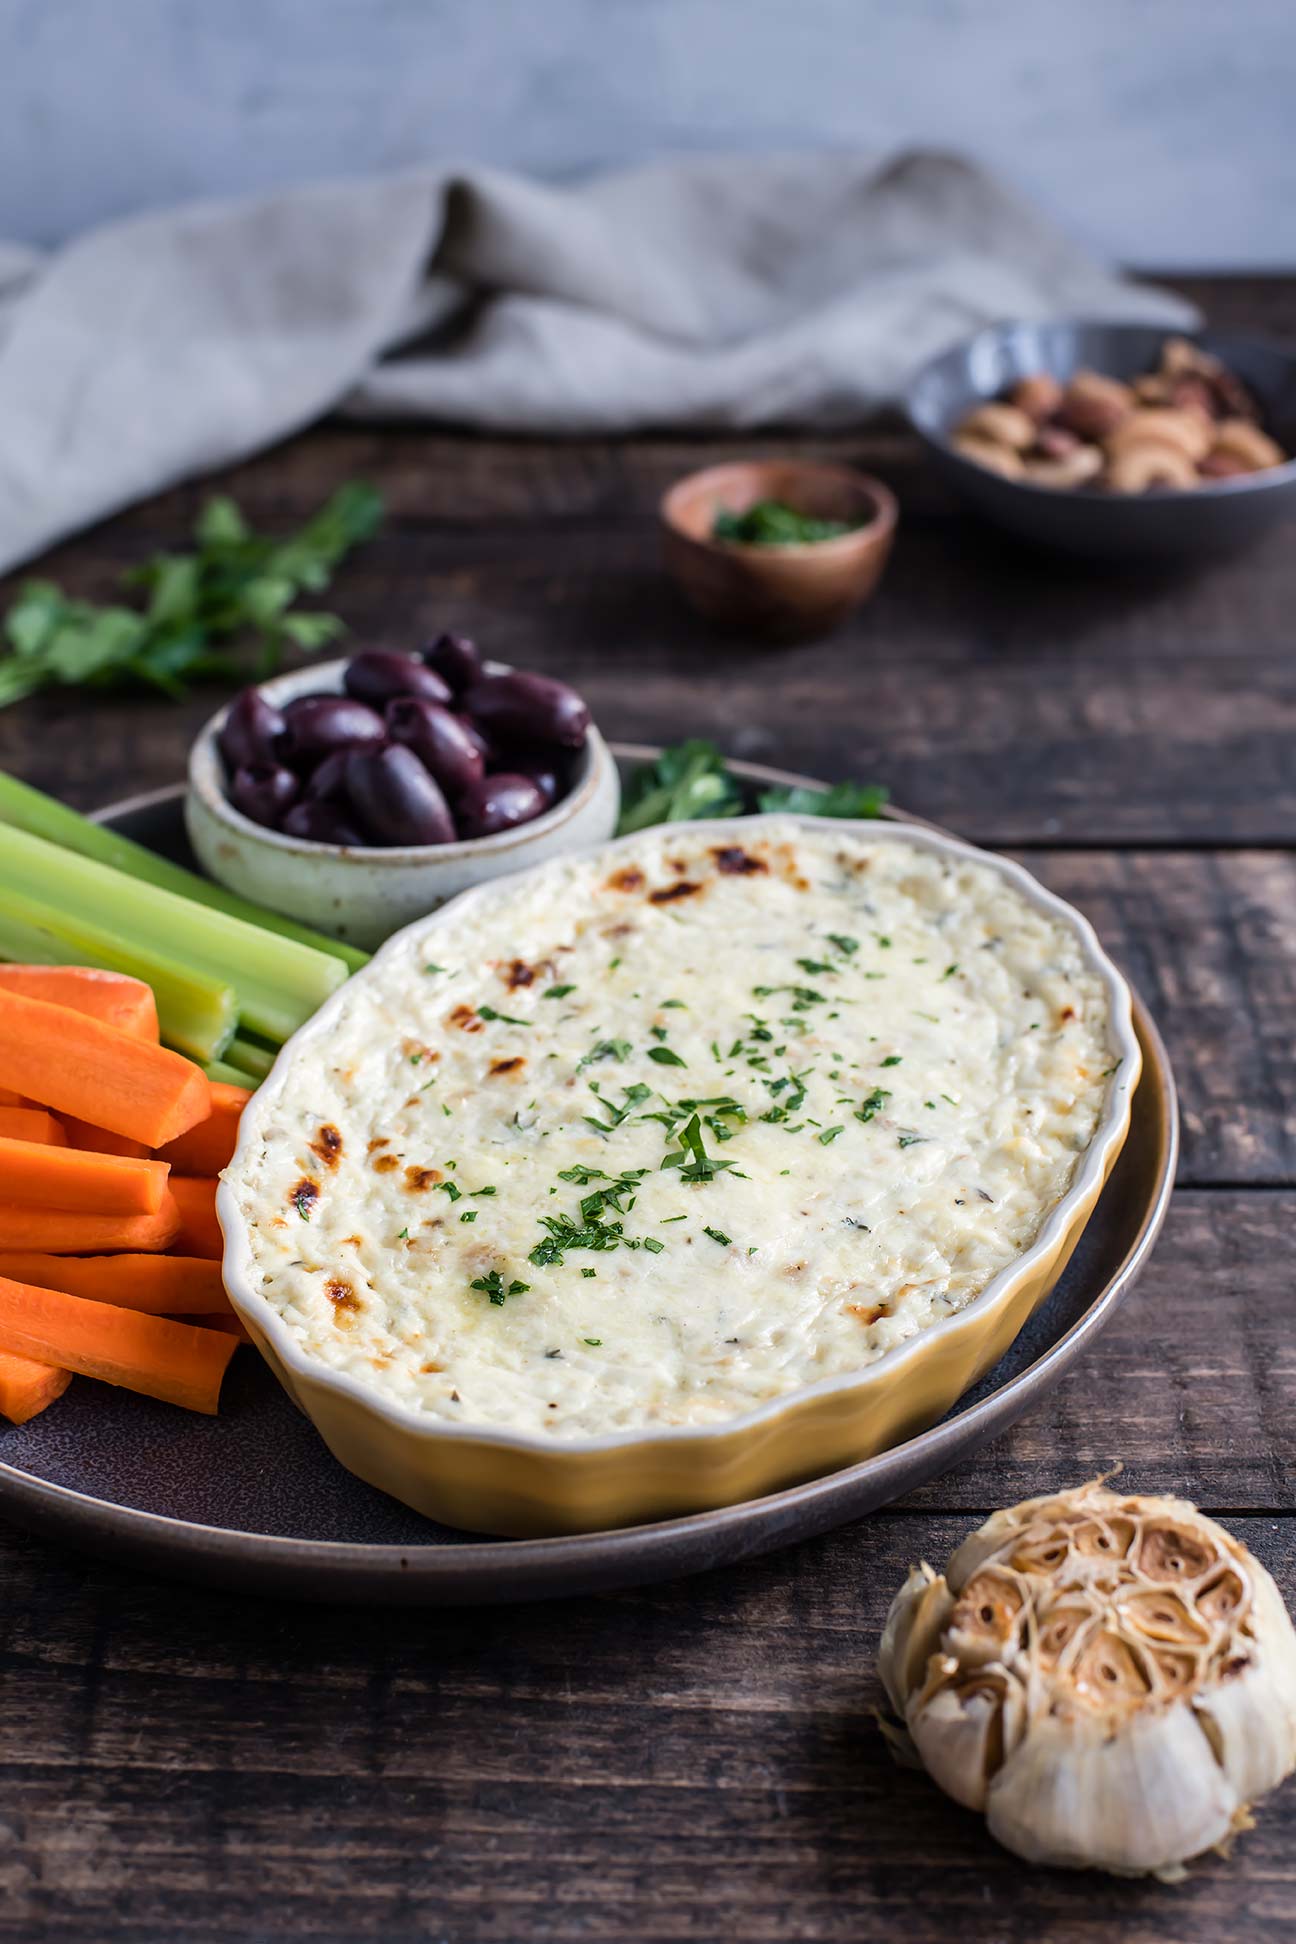
    Warm Gruyère, Roasted Garlic & Thyme Dip

    Warm Gruyère, Roasted Garlic & Thyme Dip

    It is about 21°F this morning. The cold always me makes me crave crave warm, cozy dishes. This gruyère, roasted garlic and thyme dip  is just the thing to take to a New Years Eve cocktail party, or simply enjoy on the sofa after a long day, with your feet kicked up (build a fire in that fireplace, while you’re at it!).

    I went to a cocktail party this fall (potluck style), and there were at least three different spinach and artichoke dips! Tasting and comparing them all was fun, but really? Three versions? Seems everyone was on the same page that night. I LOVE spinach artichoke dip, and this dip hits the same craving but mixes it up a bit.

    Warm Gruyère, Roasted Garlic & Thyme Dip
    Warm Gruyère, Roasted Garlic & Thyme Dip

    The first step in this recipe is to roast a whole head of garlic. Have you roasted garlic before? YUM. It becomes golden and soft and spreadable. I roasted an extra head of garlic while I was making the one for this dip just so we could have it. It makes the best garlic garlic bread or compound butter. You may as well make the most of having the oven on!

    Surprisingly, even with a whole head of garlic in this dip, it’s a subtle flavor — not a “I’m going to be breathing garlic for the rest of the night,” flavor. The gruyère and cream cheese soften it. Thyme adds an herbaceous note. The leftovers (if you have leftovers — in the realm of cheese that’s a rare story) do well as a sandwich spread or tucked inside of an omelette with sautéd mushrooms.

    Warm Gruyère, Roasted Garlic & Thyme Dip
    Warm Gruyère, Roasted Garlic & Thyme Dip

    The new year is almost here! Wishing everyone a joyful 2019!

    Warm Gruyère, Roasted Garlic & Thyme Dip

    Published December 7, 2018 by
       Print This Recipe

    Serves: 6   |    Active Time: 75 minutes


    Ingredients:

  • 1 head of garlic
  • 1 teaspoon olive oil or avocado oil
  • 8 ounces sour cream, at room temperature
  • 2 ounces cream cheese
  • 2 ounces gruyère, finely grated, plus 2 tablespoons for topping
  • 1/8 teaspoon salt
  • 1/4 teaspoon freshly cracked black pepper
  • 1 teaspoon fresh thyme leaves
  • 1 tablespoon minced parsley for garnish
  • For serving: crudités, crackers, crusty bread, etc.

  • Directions:

    1. First, roast the garlic: preheat oven to 350° F. Chop the very top off of the head of garlic. Place on a baking sheet and drizzle with the olive/avocado oil. Place in oven and roast 45 minutes, until cloves are golden and soft.
    2. Allow garlic to cool until you can easily touch it without burning your hands, about 15 minutes. Squeeze garlic cloves into a medium-sized mixing bowl, discarding of the garlic papers. Mash garlic.
    3. Add sour cream, cream cheese, 2 ounces gruyère, salt, black pepper, and thyme to bowl. Use a fork to mix until well combined.
    4. Spread cheese mixture in a ramekin or cocotte dish. Do not over fill—make sure there is at least 1/4-inch of extra room in the dish to avoid bubbling over. Top with remaining 2 tablespoons gruyère, and place in oven and bake for 20-25 minutes, until cheese is bubbling and just starting to brown in spots on the top.
    5. Remove from oven and allow to cool 10 minutes before sprinkling with minced parsley and serving with crudités, crackers, or crusty bread.
    6. Leftovers? Eat them cold as a spread on toast, sandwiches, etc, or re-warm the dip in the microwave for 30-second intervals or in an oven until warmed through.

    Comment