Leftover Turkey Enchiladas

Leftover Turkey Enchiladas

It’s not Thanksgiving for another week. I know. But here’s what else I know: when the day comes, and you eat everything delicious (stuffing, pie, turkey, gravy, potatoes, etc etc etc), there are going to be leftovers. (What’s Thanksgiving without leftovers?!)

And the day after Thanksgiving, maybe you’ll want another round of traditional Thanksgiving fare, but after a few days, you’ll want to mix it up. And you’ll want to be prepared, because going to the store in that moment isn’t the answer (when you are tired from the holiday, and have plenty of turkey in the fridge and just need something to do with it). That’s where this recipe comes in.

(I’m going to admit right now that I’m more excited about using leftover turkey in enchiladas than I am about actual Thanksgiving Turkey right now. Maybe you’re a turkey purist. But this is true: enchiladas are really hard to beat.)

Leftover Turkey Enchiladas

Now, last year when I started making enchiladas more frequently, my dad asked me if I was frying my tortillas. He said, you have to fry your tortillas. It’s far superior. And I remember the days of making enchiladas along side him — him frying the tortillas, and me, stuffing and rolling them and trying to keep up. And they were delicious.

But this recipe doesn’t ask you to do that. What’s with that? Well, this recipe is a more “get these enchiladas made tonight,” “get dinner on the table,” type of recipe. Frying tortillas definitely takes a bit more commitment (and you must deal with that dreaded pot of hot, used oil when you are done!). And you know what? Even when you skip the frying part, they’re still delicious.

So if you, like me, are trying to get dinner on the table, or hate slaving over a pot of boiling oil, try the sauce method. The sauce method is just easy enough that suddenly making enchiladas is something I do on a slow afternoon, rather than a production that requires planning and multiple hands and a commitment to the craft. Simplifying that one step makes enchiladas just that much more accessible for me.

If you do want to fry your tortillas (🙌 good work!) you’ll have to change up step 4 in the recipe below. You’ll need to heat up a pan with enough frying oil to dip a tortilla into it, and you’ll want to set up a place to let the fried to tortillas drain. We always used a plat stacked with paper towels, which soak up excess grease. Once the oil is hot, you’ll want to use tongs to place tortillas one at a time in the hot oil. Fry for 5 seconds on each side, and then set on the prepared plate. Many hands make for fast work. The reason why this was practical (and fun!) when I was a kid was that there were two of us: my dad would do the frying while I would do the stuffing. If you don’t have the luxury of a friend or helper in the kitchen, you can fry all the tortillas, placing them in a stack, and then stuff them. Placing them in a stack will help keep them soft. But again, if you just want some enchiladas now, use the sauce method in the recipe below.

Leftover Turkey Enchiladas

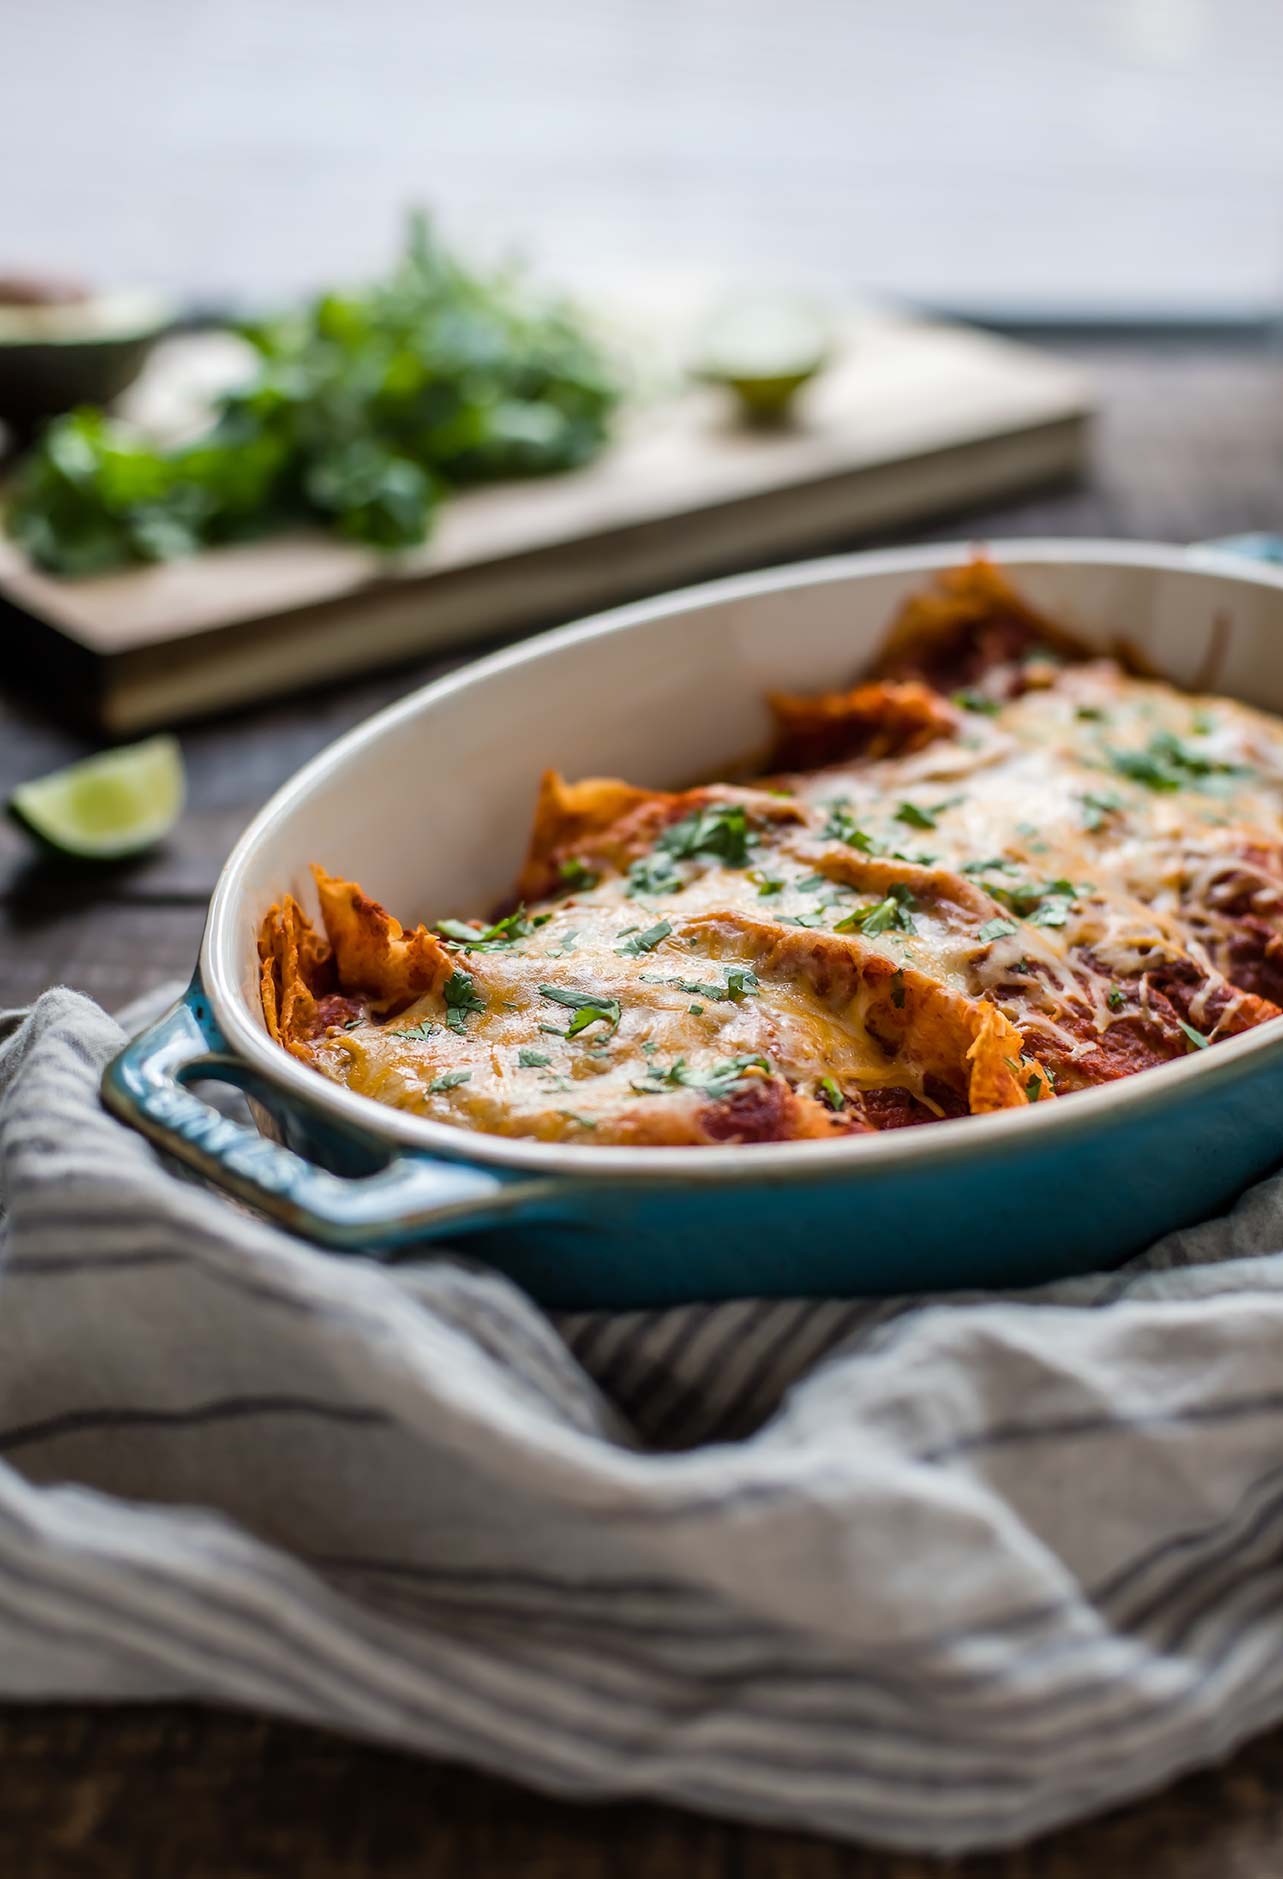
P.S. The turquoise casserole dish in these images is my newest kitchen toy, and I love a) how well it cooks things, b) it’s rustic style, and c) the color. I got it on Amazon (affiliate link!).

P.S.S. Enchiladas SCREAM Christmas to me. I guess it’s a family thing. So, you can also use chicken in this recipe if you no longer have leftover turkey around. I use chicken in enchiladas all the time!

Leftover Turkey Enchiladas

Published November 13, 2018 by
   Print This Recipe

Serves: 6-8   |    Active Time: 60 minutes


Ingredients:

  • 3 cups shredded leftover turkey or chicken breast
  • 1 teaspoon coconut oil
  • 1 cup diced onion
  • 2 teaspoons minced garlic
  • 1/4 cup minced cilantro, plus more for garnish
  • 1/4 teaspoon salt (or to taste)
  • 1 teaspoon ground cumin
  • 1/2 teaspoon dried oregano
  • 1 teaspoon chipotle chili powder
  • To assemble:
  • 2 cups enchilada sauce
  • 1-1/2 cups shredded cheese (try Colby Cheese, Monterrey Jack Cheese or a mix of the two)
  • 16-20 six-inch corn tortillas

  • Directions:

    1. In a skillet, heat the coconut oil over medium heat until it sizzles. Sauté onion and garlic in oil until onions are translucent, and then remove from heat.
    2. In a medium mixing bowl, combine: shredded turkey, onion and garlic, cilantro, salt, cumin, oregano, and chili powder. Mix to combine and set aside.
    3. Preheat oven to 350°F. While the oven heats, assemble the enchiladas.
    4. Work with one tortilla at a time. Dip a tortilla into the enchilada sauce and allowing the tortilla to soften for 20-30 seconds. This helps the tortillas from cracking as you roll them (they still might a little bit, though once it's all baked up no one will know). Then, scoop 2-3 tablespoons of the turkey mixture into the middle of the tortilla, and roll it around the filling. Place the rolled enchilada seam-side down in a baking dish.
    5. Repeat step 4 until all of the turkey and tortilla mixture is used. Then, pour remaining enchilada sauce over the enchiladas, and top with shredded cheese.
    6. Bake enchiladas for 20 minutes, until cheese and sauce are bubbling and edges of tortillas are starting to crisp.
    7. Allow to cool for 5 minutes, and then garnish with minced cilantro and serve warm.

    Comment

    Red Chili Enchilada Sauce

    Red Chili Enchilada Sauce

    This is a bit of a teaser for what’s to come on Thursday — for simplicity sake, I wanted to break out the instructions for the sauce and another recipe (plus, there are plenty of ways to use this sauce!). And no… enchiladas are not on the docket! (Though that reminds me I should make some enchiladas soon). In any case, my lips are sealed. You’ll see Thursday’s recipe soon enough!

    I first “dared” to make my own enchilada sauce while I was working in a restaurant in college. I was not the saucier, or anything close to it — more like waitress that occasionally helped with some baking - but when I was baking, I would watch the happenings of the kitchen while I slowly stirred a caramel, weighed flours, or chilled dough. It just so happened that my station was right next to the saucier, and that is what gave me the confidence to make this sauce.

    Red Chili Enchilada Sauce

    First, I realized that the marvelous sauce that was used for braising pork was as simple as puréeing some select ingredients in the blender — and then, I realized that said sauce was pretty darn close to enchilada sauce. I did a little bit of reading and next thing you know I was blending enchilada sauce every week (even without the blender lid on one time… but we’ll save that messy story for another time).

    You can use this sauce for oh so many more things than enchiladas (though using it in these leftover turkey enchiladas is perfect). In fact, I started using it to braise beef (Oofta! That recipe is old — please forgive those grainy photos. Oh what a difference three years makes), but now I’m much more into making enchilada casseroles or huevos rancheros with salsa rojo.

    Sauce is the start of many a great dish. More sauce! If any of you have ever watched Chopped, you know the judges are always talking about sauce, and with good reason. 😋

    Red Chili Enchilada Sauce

    Red Chili Enchilada Sauce

    Published September 25, 2018 by
       Print This Recipe

    Serves: 2 cups   |    Active Time: 20 minutes


    Ingredients:

  • 1 yellow onion, diced
  • 2 cloves garlic, minced
  • 1 teaspoon coconut oil
  • 1 sixteen-oz can of diced tomatoes
  • 1/2 cup broth (chicken, beef or veggie)
  • 1/4 cup chili powder
  • 1 teaspoon ground cumin
  • 1 teaspoon ground coriander
  • 1/2 teaspoon salt
  • 1/4 teaspoon cracked pepper

  • Directions:

    1. Heat coconut oil over medium-high heat in a skillet on the stove. When the oil glistens, add onion and garlic and sauté until onions are transparent and starting to brown. Remove from heat.
    2. In a blender (I use a Blendtec - affiliate link!), combine onions and garlic, diced tomatoes, broth, chili powder, cumin, coriander, salt, and pepper. Secure lid on blender and purée.
    3. Use sauce immediately or store in an air-tight container in the fridge for up to a week.

    2 Comments

    Zoodle Pad Thai with Chicken

    Zoodle Pad Thai

    If I were to dream about Pad Thai (you know, just hypothetically...), I think it would look like this. A rainbow mess of veggie noodles and hot, savory steam rising from the pan.

    I mentioned it in my Thai Basil Chicken Recipe, but I love when Thai food is overloaded with veggies. Zoodles are the perfect way to do that! Regular Pad Thai calls for rice noodles, and I’ve made it that way, but what I love more is this combo of zoodles with caramelized red pepper strips and bright carrots. Hello, rainbow in a skillet!

    Zoodle Pad Thai

    This dish is also a “throw it all in the pan” sort of meal, which is just my style. If I know we’re going to be home late, I’ll spiralize the zucchini and chop the peppers and carrots in the morning, so that in the evening all I have to do is put things in a pan before eating. First the chicken, then the carrots and peppers, and finally the zoodles—they cook virtually instantly, so you barely have to wait before digging in!

    Remember to sprinkle with crushed peanuts or cashews and a drizzle of Sriracha before you take the first bite. The crunch and zing is worth it. And if you want to really flex you culinary muscles, crack and egg into the pan in the last few minutes, scrambling it a bit. 

    Zoodle Pad Thai

    If you like this recipe, you'll also love this Zoodle Chicken Chow Mein, with cabbage and green beans.

    Zoodle Pad Thai with Chicken

    Published January 18, 2018 by
       |     Print This Recipe

    Serves: 4   |    Total Time: 30 minutes


    Ingredients:

    • 2 medium zucchini
    • 1 cup carrot, julienned
    • 1 red bell pepper, sliced
    • 8 ounces chicken, cubed
    • 1/4 cup scallions, minced 
    • 1/4 cup cilantro, minced 
    • 1 tablespoon coconut oil

    • For sauce:
    • 2 cloves garlic, minced 
    • 1/4 cup tamari or soy sauce 
    • 3 tablespoons maple syrup 
    • 2 tablespoons lime juice
    • 2 tablespoons Sriracha (your favorite brand or homemade)
    • 2 tablespoon tahini 
    • 1/4 cup chicken or vegetable broth
    • 1 tablespoon fish sauce OR if you prefer, Worcestershire sauce for a more mild fish flavor

    • For serving:
    • 1/4 cup roasted peanuts, crushed 
    • 1 lime, slided in wedges

    Directions:

    1. First, use a Spiralizer (affiliate link) to turn the zucchini into zoodles. Set zoodles aside.
    2. Heat coconut oil in a skillet or wok over medium heat. Once oil glistens, add cubed chicken, browning for about 3 minutes on each side. Check to make sure the chicken is cooked through by slicing a piece in half— meat should be white all the way through, with no visible pink. If it is cooked through, use a slotted spoon to move chicken to a plate and set aside. (If any pink is left, cook in the skillet for a few extra minutes).
    3. Add julienned carrot and sliced bell pepper to skillet, sautéing until tender. Once the carrots are tender and the peppers are starting to brown on the edges, add the chicken back into the pan, along with the zoodles, minced cilantro, and scallions.
    4. Make the sauce: add all ingredients for the sauce to a small jar. Secure lid on jar, and shake until all ingredients are combined.
    5. Pour sauce into skillet, and use tongs to move zoodles and chicken around in the pan so that everything is coated. Allow sauce to come to a simmer, and cook for 1 minute (just long enough for the zoodles to cook. I like them al dente—soft with a tiny bit of bite left- but you can cook them another minute if you prefer them extra soft).
    6. Divide amongst serving bowls and top with crushed peanuts and lime wedges.

    Zoodle Pad Thai
    6 Comments